Underground fermentation lets you harness soil's natural temperature control and moisture regulation for food preservation. You'll find the ideal storage depth between 6-8 feet, where temperatures remain stable at 50-75°F (10-24°C). Your pit should have a narrow opening that widens at the bottom, with a base diameter 1.5 times wider than the top. Add rocks and gravel for drainage, then line with clay or masonry for stability. You'll want to maintain airtight conditions and monitor moisture levels below 0.91 water activity to prevent harmful bacteria. These time-tested techniques hold centuries of preservation wisdom waiting to be revealed.
The Science Behind Earth Storage
The fascinating science behind soil storage reveals a complex underground ecosystem where countless factors work in harmony. You'll find that soil composition varies dramatically, even between neighboring plots, with differences in moisture, acidity, and microbial populations at various depths. Traditional salt preservation methods can be effectively combined with underground storage for enhanced food preservation outcomes.
When you examine soil closely, you'll discover that soil organic matter (SOM) serves as the cornerstone of carbon sequestration. It's formed through an intricate process where microorganisms, including bacteria and fungi, break down organic materials. These microscopic workers don't just decompose matter – they're also essential architects of soil structure, creating stable aggregates that protect stored carbon.
You're witnessing a remarkable partnership when you look at plant-soil interactions. Through photosynthesis, plants channel atmospheric CO2 into the soil, where root systems collaborate with microbes to transform it into stable organic carbon.
The soil food web you'll observe involves complex relationships between roots, microorganisms, and elemental nutrients, all contributing to carbon storage. This natural system isn't just efficient – it's potentially unlimited in its capacity to capture and store CO2, making it Earth's most promising carbon sink.
Traditional Underground Pit Design
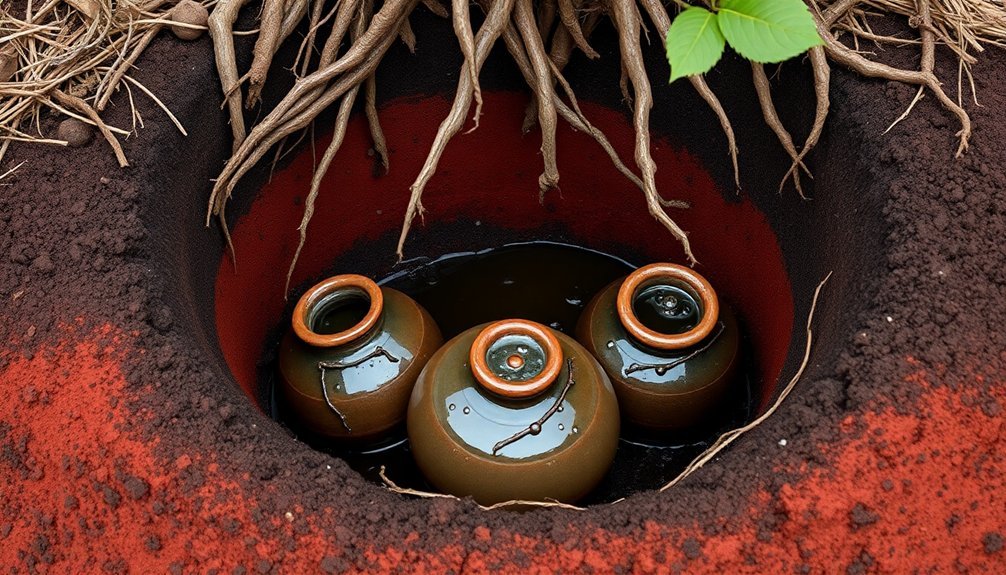
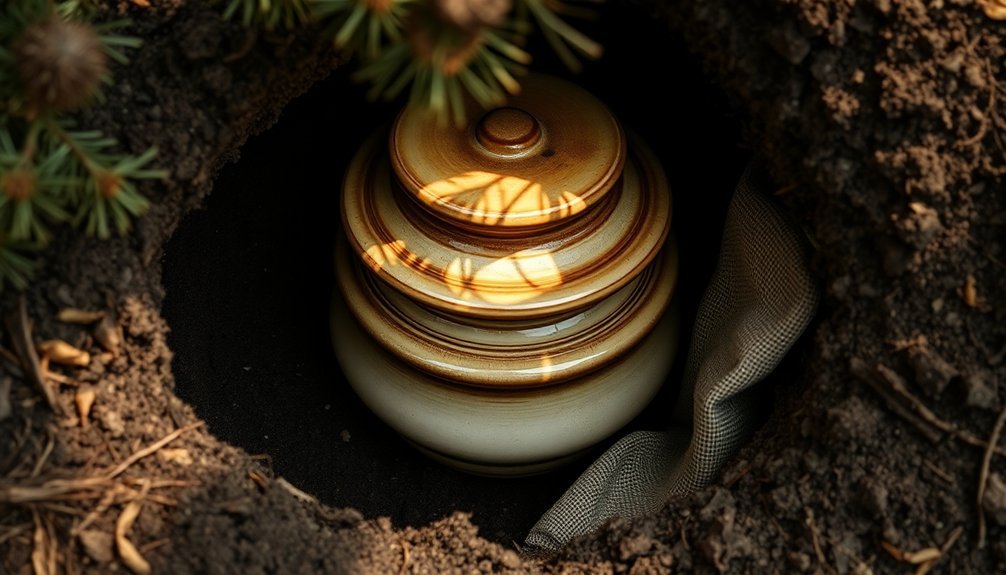
You'll want to start your underground pit with a narrow opening that widens at the bottom, creating a traditional flask-like shape that prevents cave-ins and maximizes storage space.
For ideal stability, dig your pit to a depth between 6 and 8 feet, making sure the base diameter is roughly 1.5 times wider than the top opening. A layer of rocks and gravel should be added at the base for proper drainage.
The design's effectiveness relies on proper width-to-depth ratios, so you should maintain consistent measurements as you dig downward, keeping the walls smooth and firmly packed.
Flask-Like Storage Construction
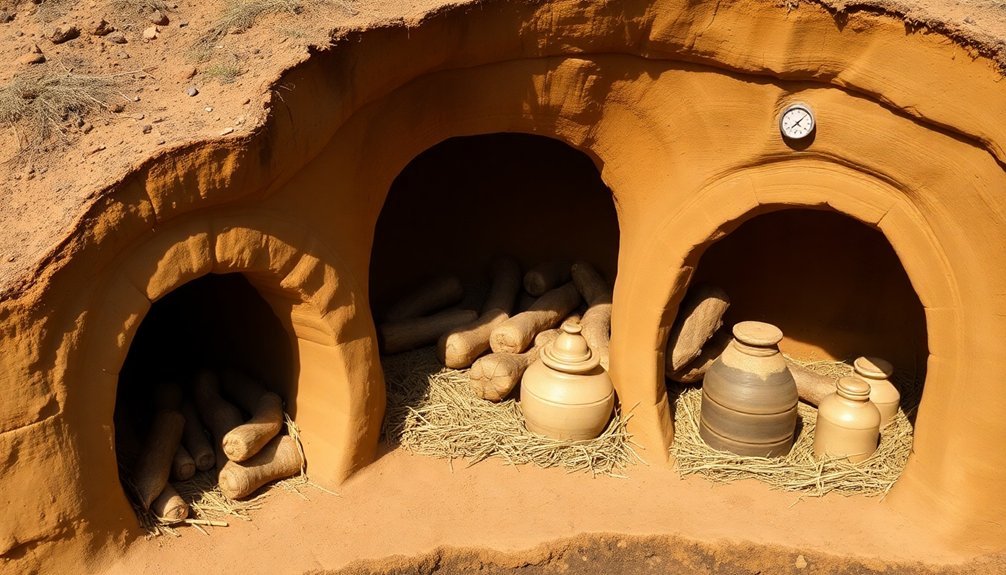
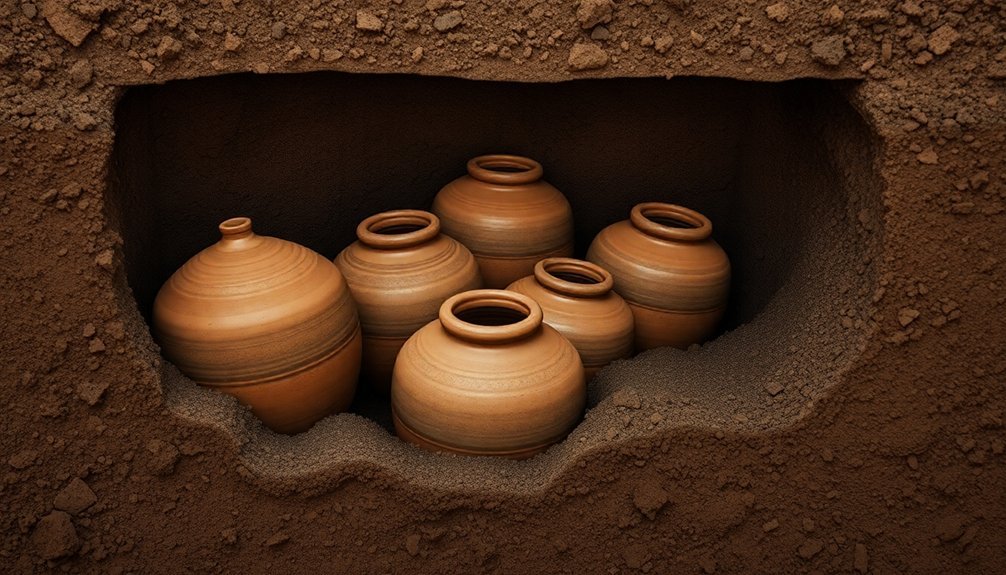
Construction of traditional underground storage pits mirrors the design of ancient flasks, combining readily available materials like clay, masonry, and uncoated rock to create stable preservation environments.
Modern stainless steel containers have largely replaced traditional materials due to their superior operational efficiency and higher fermentation yields.
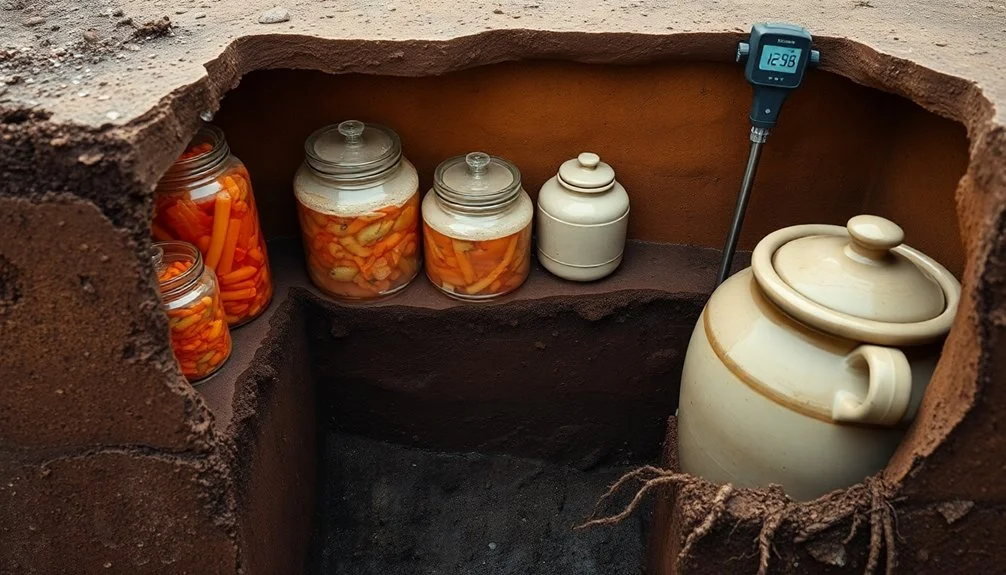
You'll find these structures enhanced for depth, typically reaching beyond 4 meters to maintain temperatures between 12°C and 16°C.
When you're designing a flask-like storage pit, you'll need to think about these essential elements:
- Clay lining for impermeability and natural sealing against pests
- Rock structures for thermal stability and cooling properties
- Integrated access systems with pulleys and handles for maintenance
- Airtight covers with hold-down bolts to prevent contamination
- Temperature monitoring devices and sampling equipment
The soil's natural insulating properties work to your advantage, stabilizing internal temperatures regardless of external conditions.
You'll want to incorporate modern elements like polyethylene plastic barriers to prevent moisture loss while maintaining the traditional benefits of underground storage.
The design should prioritize easy cleaning access while ensuring protection against common threats like flooding, dust, and pest infiltration.
For best results, you'll need to maintain regular cleaning schedules and monitor the storage environment consistently.
Depth and Width Specifications
Building on the flask-like design principles, proper sizing of underground storage pits demands careful attention to both depth and width measurements.
You'll need to position your pit at the highest point of the landscape to prevent water infiltration, and choose soil conditions that support nearly vertical walls, such as clay or conglomerate.
When determining width, plan for approximately one and a half times the width of your bulldozer blade.
You'll want to evaluate the pit's ends carefully – if you're using an auger, make them as steep as possible while maintaining safety.
However, if you're planning to use trucks or front-end loaders, make sure one end has a slope no steeper than 1:3 to prevent cave-ins.
For depth calculations, you'll need to factor in your grain type and volume requirements.
Remember that wheat requires 1.3 cubic meters per tonne, barley needs 1.6 cubic meters, and oats demand 1.9 cubic meters.
Verify your final grain level sits slightly above ground surface.
While excavating, keep in mind that your depth limitations will depend on both your site conditions and your excavator's capabilities.
Don't forget to maintain adequate clearance for year-round vehicle access.
Preparing Your Storage Location
A proper storage location forms the foundation of successful fermentation and preservation. You'll need to carefully prepare your space to maintain ideal conditions for your ferments, guaranteeing they remain safe and flavorful throughout the storage period.
Creating the right environment helps prevent spoilage and maintains the quality of your preserved foods.
When setting up your storage area, focus on these critical elements:
- Keep temperatures consistently between 60-65°F (16-18°C) for ideal fermentation
- Choose a dark location away from direct light exposure
- Position storage away from heat sources like fridges and water heaters
- Maintain a dry environment to prevent unwanted bacterial growth
- Use rodent-proof containers with proper insulation
Before storing your ferments, you'll need to sterilize all containers and equipment thoroughly.
Choose high-quality clip-top jars like Fido or Kilner varieties, as they're better suited for long-term storage than gasket-style lids.
Pack your vegetables tightly and guarantee they're completely submerged under brine using fermentation weights.
Don't forget to use containers that allow fermentation gases to escape while preventing contamination from entering.
Regular monitoring of your storage area helps catch potential issues before they compromise your preserved foods.
Temperature Control Through Soil
Through the natural insulating properties of soil, you can maintain ideal fermentation temperatures without relying on modern climate control systems. At depths below 3 meters, soil temperature remains remarkably stable, making it an excellent medium for controlling fermentation environments.
To enhance your soil storage for fermentation, you'll need to take into account several key factors. Darker soils will absorb more heat, while ground cover like mulch can help regulate temperature fluctuations.
You'll want to maintain temperatures between 50°F to 75°F (10-24°C) for optimal fermentation activity, and you can achieve this by selecting the right depth for your storage.
Monitor your soil temperature by taking readings at different depths – surface temperatures can vary considerably, but deeper soil maintains more consistent conditions.
You'll find that seasonal changes have less impact at greater depths, providing a more stable environment for your fermentation process. For best results, position your storage at a depth where microbial activity remains consistent but not too deep to access easily.
Remember that proper temperature control doesn't just preserve your ferments – it enhances the beneficial microbial activity that's essential for successful fermentation.
Moisture Management Methods
Successful fermentation depends heavily on proper moisture management in your soil storage environment. You'll need to carefully control water activity and maintain ideal moisture levels to guarantee your fermentation process succeeds.
By understanding how water moves through your storage medium, you can create perfect conditions for preservation while preventing unwanted bacterial growth.
- Monitor water activity levels closely – most harmful bacteria can't survive below 0.91
- Use salt brines to control moisture and naturally inhibit bacterial growth
- Implement negative-pressure auto-controlled irrigation for consistent water distribution
- Add water-retention materials like superabsorbent polymers to maintain stability
- Keep your setup clean and sterile to prevent moisture-related contamination
To maintain proper moisture levels, you'll want to focus on capillary water supply, which is essential for microbial activity.
Consider using weights to keep vegetables properly submerged in brine solutions, and establish proper air escape mechanisms to prevent over-pressurization.
If you're working with standard soil storage, maintaining 75-80% relative humidity typically provides ideal conditions.
Don't forget to regularly check moisture status and adjust your setup accordingly – this might mean modifying pressure control points or adding moisture-controlling solutes like salt or sugar when necessary.
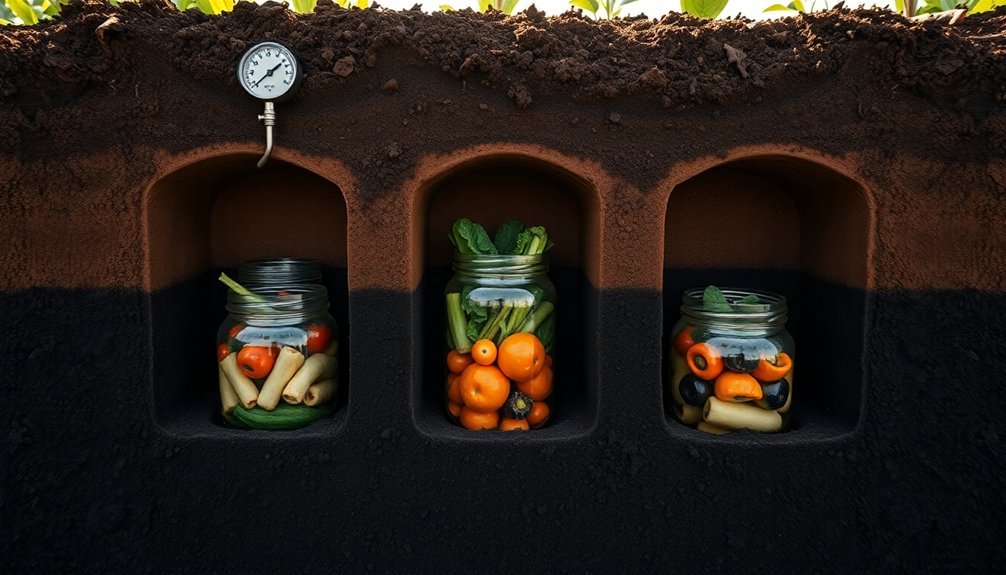
Creating Hermetic Storage Conditions
You'll need to seal your storage space quickly using proven techniques like lined underground pits or well-sealed containers to establish proper hermetic conditions.
Your focus should be on achieving rapid oxygen depletion through biological respiration while maintaining consistent temperatures below ambient levels.
To guarantee success, you can incorporate natural materials like damp straw or green plant matter that accelerate oxygen reduction and help stabilize the storage environment.
Rapid Sealing Methods
Creating hermetic storage conditions requires quick and efficient sealing techniques to lock out oxygen and maintain proper fermentation conditions. You'll need to act fast when sealing your storage containers to prevent oxygen exposure and guarantee successful preservation.
When using fermentation locks, drill a precise hole for the nylon barb and secure it immediately with hot glue for an airtight seal. For vacuum sealing, leave adequate space for CO2 buildup while removing as much air as possible.
- Use multi-layered hermetic bags to protect grains and maintain their quality for up to two years.
- Apply hot glue generously around any potential crack points to prevent air leakage.
- Monitor CO2 levels in vacuum-sealed bags and release pressure when needed.
- Install fermentation locks with proper sizing to maintain hermetic conditions.
- Test seals regularly to guarantee they remain airtight throughout storage.
Remember that effective sealing is vital for suffocating insects, preventing mold growth, and maintaining seed viability.
Whether you're using fermentation locks or vacuum sealing, you'll want to work quickly and methodically. For vacuum-sealed fermentation, you can use a lower salt percentage of 2% since you're creating an oxygen-free environment, but don't forget to leave room for gas expansion.
Oxygen Control Techniques
Three key principles drive effective oxygen control in hermetic storage: atmospheric modification, container impermeability, and precise monitoring. You'll need to understand how these elements work together to create successful storage conditions.
To modify the atmosphere effectively, you'll rely on the natural respiration process of both grain and insects. As they consume oxygen and release CO2, you'll see oxygen levels drop to as low as 0.5%, which effectively stops insect reproduction and prevents mold growth.
You'll want to select gas-impermeable containers like GrainPro Super bags, PICs bags, or metal silos to maintain these conditions.
You'll need to monitor oxygen levels carefully using dissolved oxygen sensors, which allow you to adjust conditions as needed. If you're dealing with fermentation processes, you can inject pure oxygen directly into the medium to prevent oxygen starvation.
However, you'll need to take safety precautions to prevent backflow and oil leaks that could create fire hazards.
Remember to fill your containers completely to minimize headspace and use proper sealing materials. This guarantees you'll maintain the hermetic conditions necessary for successful long-term storage.
Temperature Stability Management
Maintaining stable temperatures in hermetic storage requires a combination of natural insulation and strategic design choices. You'll find that soil's natural insulating properties work best at depths between 2-4 meters, where temperatures remain consistently between 12°C and 16°C – perfect for preservation.
By leveraging these conditions and implementing proper hermetic sealing, you're creating an environment that's protected from external temperature fluctuations.
- Underground structures built with uncoated rock maintain exceptional temperature stability
- Soil characteristics like density and moisture content directly impact insulation efficiency
- Hermetic sealing prevents moisture reabsorption and unwanted environmental influences
- Temperature control during fermentation can be fine-tuned using chamber size adjustments
- Strategic depth placement helps maintain ideal preservation temperatures year-round
When you're designing your storage space, consider both the building materials and structural geometry, as they'll considerably impact temperature stability.
You can enhance natural cooling properties by incorporating appropriate coatings and ensuring proper air-tight seals.
During active fermentation, you'll want to manage ambient temperatures carefully to prevent unwanted temperature spikes, which you can achieve through chamber size optimization and strategic cooling techniques.
Loading and Sealing Techniques
Successful fermentation begins with proper loading and sealing techniques.
You'll need to start by preparing sterilized vessels that can maintain anaerobic conditions. Pack your vegetables tightly, ensuring uniform piece sizes and minimal air pockets. When loading, leave enough headspace for the fermenting liquid to expand while keeping vegetables fully submerged under the brine.
Your brine solution's salinity is essential – it should support beneficial bacteria without being overly salty. Use a fermentation weight or clean stone to keep vegetables below the brine level, and cover the vessel loosely to allow gases to escape. If you've got a fermentation lock, use it to monitor the process.
Once fermentation's complete, you'll need to seal the vessel tightly to prevent oxygen entry. Use sterilized equipment and filtered water to top off any gaps.
Store your sealed vessels in a cool, dark place between 32°F to 40°F. Don't forget to check regularly for signs of spoilage or leakage, and keep your storage area clean and pest-free.
Remember to avoid excessive movement of the vessels and maintain consistent temperature conditions for ideal preservation.
Pest Prevention Strategies
You'll need multiple layers of protection to keep pests out of your stored soil, starting with natural barriers like marigolds and daffodils planted around your storage area.
Setting up physical barriers, including wire mesh and sealed containers, creates an effective defense system against unwanted invaders.
Control oxygen levels in your storage containers by using airtight seals and moisture-absorbing materials to make the environment less hospitable for pests that might slip through your initial defenses.
Natural Pest Barriers
Natural pest barriers form a critical line of defense in protecting soil and crops from unwanted invaders.
You'll find that combining physical barriers with natural repellents creates a robust protection system that doesn't compromise soil health. By strategically implementing these barriers, you're establishing multiple layers of protection that work together to deter pests.
- Install row covers and fencing to create immediate physical obstacles while maintaining proper air circulation.
- Apply diatomaceous earth around plant bases to control soft-bodied insects without harming beneficial organisms.
- Use fermented plant preparations like kiwi pulp and nettle juice to generate natural pest-repelling compounds.
- Incorporate sulfur applications to manage persistent pests like psyllids and mites.
- Implement trap crops strategically to redirect pests away from your main crop.
You can enhance these barriers' effectiveness by combining them with biological controls like neem oil and beneficial nematodes.
Don't forget to maintain field-edge vegetation that supports beneficial insects while using underground barriers to prevent tunneling pests.
The key is creating a balanced system where natural deterrents work alongside physical barriers to protect your soil and crops without disrupting the essential biological processes happening beneath the surface.
Oxygen Control Methods
Maintaining proper oxygen levels is a powerful pest prevention strategy that targets unwanted organisms while supporting beneficial soil life.
You'll need to monitor and control oxygen content using specialized sensors that provide real-time data, helping you enhance the storage environment and prevent pest infestations.
You can regulate oxygen levels through a combination of gas supply systems and efficient stirring methods.
Install gas regulating valves and flow meters to manage oxygen distribution, and consider using oxygen-enriched air when necessary.
Your stirring system should promote even oxygen distribution throughout the soil medium, which you can adjust automatically or manually based on sensor readings.
Don't forget to manage carbon dioxide buildup, which can create an environment favorable to pests.
You'll want to implement a venting system that removes excess carbon dioxide while maintaining ideal oxygen concentrations.
Using nitrogen or other inert gases can help carry away unwanted carbon dioxide without disrupting the storage environment.
Sealing Against Invaders
Creating an impenetrable barrier against pests starts with a thorough sealing strategy that targets common entry points and vulnerabilities.
You'll want to combine physical barriers with natural deterrents to create a multi-layered defense system that keeps unwanted visitors at bay.
- Install crushed rock or cement barriers around your storage perimeter
- Dig trenches filled with wire mesh to block underground access
- Plant marigolds, daffodils, and allium varieties as natural repellents
- Place sonic spikes strategically to create electronic pest barriers
- Apply castor oil and dish soap mixture around vulnerable areas
Don't forget to maintain proper sanitation by promptly cleaning spills and keeping stored items away from walls.
You'll need to remove any potential food sources, including crop residue and plant debris.
Consider implementing strip harvesting techniques to manage pest populations without driving them toward your valuable stored goods.
Regular inspections are essential – document your findings and address any new entry points immediately.
For extra protection, you can attract natural predators by installing barn owl nests near your storage area and use pet deterrents strategically around known pest entry points.
Optimal Depth Requirements
Understanding proper soil depth plays an essential role in successful fermentation storage. You'll need to balance temperature stability, moisture control, and accessibility to achieve ideal results.
| Depth Factor | Impact |
|---|---|
| Temperature | Deeper soil maintains 65-75°F consistently |
| Moisture | Mid-depths prevent excess humidity buildup |
| Light/Oxygen | Greater depth increases protection |
| Accessibility | Shallower depths enable easier monitoring |
When you're selecting your storage depth, consider that deeper soil layers provide more stable temperatures, which is vital for maintaining healthy fermentation. However, you don't want to go too deep, as you'll need to monitor your ferments regularly. The perfect depth should protect against temperature fluctuations while remaining accessible.
You'll find that moisture control becomes more challenging at greater depths, where humidity tends to increase. While some moisture is necessary for fermentation, excess can lead to spoilage. At the same time, you'll want enough depth to shield your ferments from light and oxygen exposure, both of which can compromise your results. Strike a balance by choosing a depth that offers protection while allowing you to easily check and maintain your stored items.
Maintaining Food Quality Underground
Proper underground storage requires careful attention to multiple environmental factors that affect food quality. You'll need to monitor temperature, moisture, oxygen levels, and pH conditions to guarantee your food remains well-preserved. Understanding how these elements interact helps you maintain ideal preservation conditions while preventing spoilage.
Key factors for maintaining food quality underground:
- Control moisture levels through proper soil selection and drainage
- Monitor temperature consistency to slow microbial growth
- Create oxygen-poor environments to prevent aerobic spoilage
- Maintain appropriate pH levels using alkaline or acidic additives
- Check regularly for signs of contamination or deterioration
You can enhance preservation by preparing your food properly before burial. Consider using salt, brine, or traditional preservatives to create additional barriers against spoilage.
When you're storing foods underground, it's crucial to select appropriate containers or wrapping materials that protect against soil contamination while maintaining the desired environmental conditions.
You'll find that some foods, like rice and root vegetables, are particularly well-suited for underground storage during dry seasons. Through careful monitoring and management of these conditions, you can maintain both nutritional value and palatability for extended periods.
Safe Retrieval Procedures
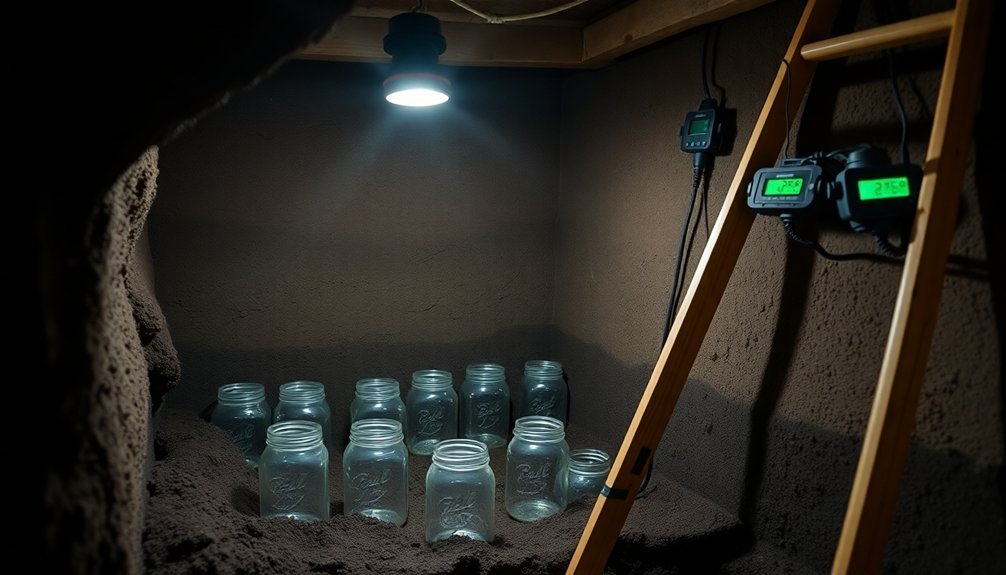
Once you've maintained ideal storage conditions, retrieving your underground food stores requires careful attention to safety and cleanliness. Before retrieving your ferments, make sure you've got clean, sterilized containers and utensils ready for handling.
You'll need to carefully inspect the storage area for any signs of disturbance or contamination that could affect your preserved foods.
When you're removing containers from underground storage, check them immediately for cracks or damage. You'll want to examine the brine levels and look for any obvious signs of spoilage, such as unusual odors or mold growth. If everything looks good, carefully transfer the containers to your designated processing area.
After retrieval, you'll need to maintain proper storage conditions to preserve the quality of your ferments. Keep them in a cool, dark place between 60-65°F (16-18°C), away from heat sources and direct light.
When you're ready to use your ferments, remember to use clean utensils and avoid cross-contamination. Once opened, transfer the ferments to the refrigerator and consume them within a reasonable timeframe to guarantee you're getting the best quality and safety from your preserved foods.
Frequently Asked Questions
How Long Does It Take to Construct an Underground Storage Pit?
You'll need several weeks to months to build your storage pit, depending on your equipment and labor. Using mechanized excavation speeds up construction, while manual digging and proper sealing takes considerably longer.
Can Different Types of Food Be Stored Together in Underground Pits?
You shouldn't store different foods together underground. Keep fruits separate from vegetables, and group root vegetables together. Use barriers like sand or straw between food types to prevent cross-contamination and spoilage.
What Materials Work Best for Lining the Walls of Storage Pits?
For your storage pit walls, you'll get the best results using clay mud with fiber, concrete blocks, or HDPE liners. These materials prevent moisture loss and provide durability while protecting your stored items.
How Often Should Underground Storage Pits Be Inspected for Maintenance?
You'll need to inspect your storage pits at least every 3 months, checking for moisture, cracks, and structural issues. Don't skip annual thorough inspections to assess wall integrity and drainage systems.
What Emergency Measures Exist if the Hermetic Seal Becomes Compromised?
If your hermetic seal fails, you'll need to quickly reseal using food-grade silicone, replace damaged gaskets, or transfer contents to a new container. You can also add an extra layer of wax or tape temporarily.
In Summary
You'll find underground fermentation and storage to be an effective preservation method when you follow proper techniques. Remember to monitor your pit's temperature and moisture levels regularly, maintain pest barriers, and guarantee safe access to stored items. While it requires initial setup effort, you're creating a sustainable, energy-free storage system that connects you to ancient preservation wisdom while keeping your food fresh year-round.


Leave a Reply