Your sauerkraut's 14-day fermentation journey starts with Leuconostoc bacteria creating an anaerobic environment in the first 3 days. You'll notice initial bubbling and a slightly tangy aroma. From days 4-7, Lactobacillus species take over, increasing the acidity and making the cabbage more translucent. During days 8-12, the environment becomes increasingly acidic as fermentation peaks with intense bubbling. The final stage (days 13-14) sees Lactobacillus brevis completing the process, with bubbling slowing down and pH stabilizing at 3.6-3.7. Understanding each stage's unique characteristics will help you master this traditional preservation method.
Getting Your Equipment Ready
Every successful cabbage fermentation starts with the right equipment. You'll need to choose a fermentation vessel that matches your batch size – mason jars work well for small batches, while water-sealed crocks are ideal for larger quantities.
If you're using a jar or crock, make sure you've got proper weights to keep your cabbage submerged in the brine. The Luna Glass Crock Weights included with quality fermenting crocks are specifically designed for this purpose.
You'll also need to gather your processing tools, including a cabbage shredder (a mandolin works for small batches) and a tamper to pack the cabbage tightly.
Don't forget to include non-corrosive utensils like wooden scissor tongs to handle your ferment. An airlock system is essential for creating the anaerobic environment your cabbage needs to ferment properly.
Before you begin, clean all your equipment thoroughly to prevent contamination.
Set up your fermentation station in a cool, dark place where the temperature stays between 60-75°F.
Place your vessel in a shallow bowl to catch any overflow during fermentation.
Finally, prepare your brine using sea salt at a ratio of 1 teaspoon per cup of water – you'll need this ready when you start processing your cabbage.
Preparing Fresh Cabbage
Fresh cabbage selection sets the foundation for successful fermentation. You'll want to choose firm, fresh heads and remove their outer leaves before giving them a thorough rinse under cold water.
Once cleaned, quarter the cabbage heads and remove the cores. Then, shred or slice the cabbage to roughly quarter-inch thickness, making sure it's well-drained before moving forward.
This traditional lacto-fermentation process relies on beneficial bacteria to create a naturally preserved food. Next, you'll need to add 3 tablespoons of salt for every 5 pounds of cabbage. Mix the salt thoroughly and massage it into the shredded cabbage. Let it sit for anywhere between 15 minutes to 2 hours, allowing the salt to draw out the natural juices. During this time, you can add any additional flavoring ingredients like garlic or spices.
When the cabbage has released enough liquid, pack it firmly into your fermentation container. You'll need to guarantee the cabbage stays completely submerged in its own juice – if there isn't enough liquid, add brine to cover it completely.
Place a fermentation weight or brine-filled bag on top to keep everything below the surface. Finally, cover your container with a clean towel or fermentation lid to protect your soon-to-be sauerkraut.
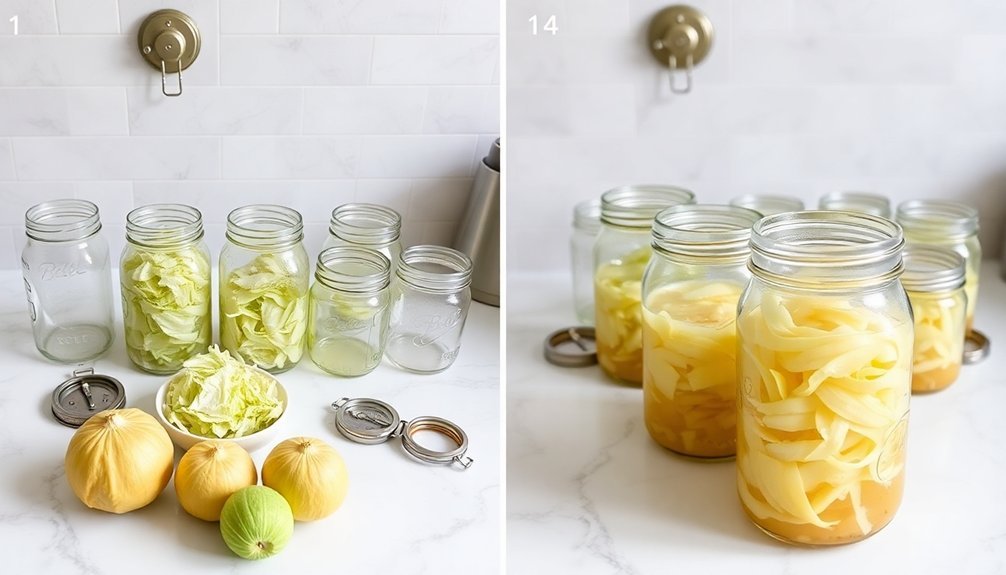
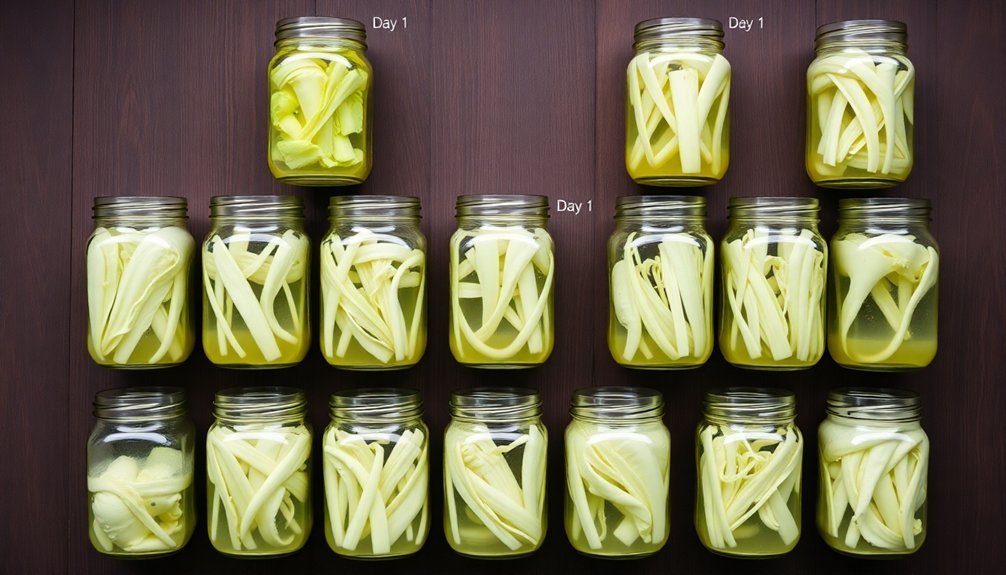
Day One Setup
To begin your cabbage fermentation, you'll need a clean mason jar, fermentation weights (or water-filled bags), and a suitable lid that allows gases to escape.
Your first task is to pack the shredded, salted cabbage tightly into the jar, making sure to include all the natural juices that were released during the initial massage. The correct amount of salt should be 2% by weight to ensure proper fermentation.
You'll then need to guarantee the cabbage stays submerged under the brine by using weights and checking that there's enough liquid to cover everything completely.
Equipment and Materials Needed
Before diving into your fermentation journey, you'll need several essential pieces of equipment to guarantee successful sauerkraut making. A mason jar or Le Parfait jar serves as your primary fermentation vessel, while glass weights keep your cabbage submerged in brine.
You'll also need a digital scale for precise measurements and basic kitchen tools like a cutting board and chef's knife. The recommended non-iodized salt concentration should be between 2-2.5% of your cabbage's weight.
For the best fermentation results, consider investing in specialized equipment that'll make your process smoother:
- A fermentation packer helps compress cabbage effectively, releasing more liquid and securing proper brine coverage.
- Wide-mouth storage caps or traditional canning lids provide necessary airflow while protecting from contaminants.
- A ceramic crock or water-sealed fermentation vessel offers better temperature control for larger batches.
- Glass weights or small water-filled jars keep vegetables submerged beneath the brine.
While sterilization isn't necessary, make certain all equipment is thoroughly cleaned before use. Choose ceramic or glass containers over plastic for better durability and food safety.
If you're using Fido-style jars, check for high-quality gaskets to prevent pressure buildup. Wide-mouth containers make packing and cleaning much easier throughout your fermentation process.
Starting the Brine Process
With your clean equipment ready, it's time to start the brine process for your sauerkraut. Begin by preparing a 2% brine solution – boil 1.5 liters of water with 30g of non-iodized salt, then let it cool completely.
While you're waiting, finely shred your cabbage using a sharp knife or mandolin.
Calculate the salt needed for your cabbage by multiplying its weight by 0.02. Massage this salt into your shredded cabbage thoroughly, which will help release the vegetable's natural juices. The starches and sugars in the cabbage will start converting to lactic acid once fermentation begins.
Place the salted cabbage into your fermentation vessel, then add the cooled brine until it completely covers the cabbage. You'll want about an inch of brine above the cabbage level.
To keep everything submerged, place a whole cabbage leaf on top of the shredded mixture, followed by your fermentation weight. Guarantee there's an inch of headspace above the brine level.
Position your jar on a catch tray and store it at room temperature (64-72°F), away from direct sunlight.
You'll need to monitor the brine level regularly, adding more if needed using the ratio of 1½ teaspoons salt per cup of water.
Early Signs of Fermentation
You'll notice the first signs of fermentation within 1-3 days as tiny bubbles start rising through the brine and the liquid turns cloudy with white sediment settling at the bottom.
During this time, you'll detect strong, sulfurous aromas that signal the natural fermentation process is underway.
Your cabbage will begin transforming from bright and crisp to more translucent as the beneficial bacteria start their work. Place your fermentation jar in a shallow catch bowl to contain any overflow as the active fermentation causes the brine level to rise.
Bubbles and Brine Activity
One of the most exciting moments in cabbage fermentation occurs within the first 48 hours when tiny bubbles begin dancing through the brine. These bubbles are a direct result of CO2 production by Leuconostoc mesenteroides bacteria, signaling that your fermentation is actively underway.
You'll notice the bubbling activity is most vigorous during these initial days, often creating a foam-like layer on the surface, especially if you're fermenting cabbage that's naturally high in sugars. Using a non-metallic tamping tool helps prevent any contamination that could interfere with this natural fermentation process.
If you're having trouble spotting the bubbles, you can gently tap the side of your jar to encourage their movement. The activity you're witnessing is part of a fascinating process where bacteria convert malic acid into lactic acid while releasing carbon dioxide.
During this time, you'll want to:
- Check your ferment daily to verify the brine level stays above the cabbage
- Keep your jar away from direct sunlight
- Maintain a temperature between 65-72°F
- Watch for signs of heaving, where CO2 production causes the volume to expand
Remember that these early signs of fermentation are vital indicators that your sauerkraut is on the right track to becoming a probiotic-rich food.
Aroma Changes Begin
As your cabbage fermentation begins, distinct aroma changes will guide you through the transformation process. In the first 48 hours, you'll notice the fresh, earthy smell of raw cabbage gradually shifting to a slightly tangy aroma as the Leuconostoc bacteria begin their work. These early volatile compounds signal that fermentation is underway. During this stage, submerging in brine is critical to create the oxygen-free environment needed for proper fermentation.
By days 4-7, you'll detect a more pronounced sourness as Lactobacillus bacteria take over, producing lactic acid that gives sauerkraut its characteristic tang. You might also notice a slight yeasty or effervescent smell from the carbon dioxide production, which is completely normal.
Around days 8-10, the aroma becomes more intensely sour but pleasant, indicating that the Lactobacillus is actively creating an acidic environment. This increased acidity is essential for preservation and flavor development. You'll find the smell growing stronger before it begins to stabilize.
As you approach days 11-14, you'll observe the aroma settling into a consistent, pleasantly tangy profile. This stabilization is a key indicator that your sauerkraut is nearing completion. The final aroma should be distinctly sour but not overwhelming.
Visual Texture Transformation
While tracking the aroma changes helps gauge fermentation progress, visible signs offer equally telling insights into your sauerkraut's development. Within the first 48 hours, you'll notice the cabbage mixture becoming more compact as it releases its natural juices.
The transformation starts quickly – within 15-60 minutes after your initial salting and mashing.
You'll want to watch for these key visual indicators that your fermentation is on track:
- Bubbles rising slowly to the surface, sometimes creating foam-like masses at the top of your jar
- The cabbage mixture expanding and moving upward as CO2 production increases
- The vegetable mass becoming more compressed and fully submerged in its own liquid
- A clear brine level rising above the packed cabbage
If you don't see enough liquid covering your cabbage after 24 hours, you'll need to add a 2% brine solution. Remember to keep the cabbage weighted down and submerged to prevent unwanted mold growth.
You can tap the jar gently to check for bubble activity if none are immediately visible – this simple test helps confirm active fermentation is underway.
Managing the First Week

The first week of cabbage fermentation demands your careful attention to guarantee success. You'll need to check your fermentation vessel daily to maintain proper conditions and address any issues that arise.
During these initial days, make certain your cabbage stays completely submerged beneath the brine by maintaining proper weight placement.
Keep your fermentation container in a dark location at 65-75°F, which provides ideal conditions for beneficial bacteria to thrive. If you notice the liquid level dropping below the cabbage, you'll need to add more salt water using the ratio of 1 teaspoon of salt per cup of water.
Remove any scum or mold that forms on the surface promptly to prevent contamination.
You can begin tasting your sauerkraut after the third day to monitor its progression, though it won't be fully fermented yet. Remember to use only non-metallic utensils when checking or handling your fermenting cabbage to avoid unwanted metallic flavors.
If you're using a cloth cover, make certain it remains clean and secure to maintain an anaerobic environment while still allowing gases to escape.
Your diligence during this vital first week will set the foundation for successful fermentation.
Monitoring Bacterial Growth
Successful fermentation depends on distinct bacterial stages that unfold during your sauerkraut-making process. During days 1-3, Leuconostoc mesenteroides kicks off fermentation by creating an anaerobic environment and multiplying rapidly within 12-14 hours.
As lactic acid levels reach 0.25-0.3%, these initial bacteria begin to die off, making way for the next stage.
From days 4-7, you'll notice Lactobacillus plantarum and L. cucumeris taking over, continuing the fermentation until lactic acid reaches 1.5-2%. Watch for bubbling and color changes in your cabbage during this period.
By days 8-12, the environment becomes increasingly anaerobic and acidic, with pH dropping to around 3.7.
- Days 1-3: Initial fermentation with Leuconostoc mesenteroides
- Days 4-7: Second stage with Lactobacillus species becoming active
- Days 8-12: Shift to homolactic fermentation
- Days 14+: Final stage with pH stabilizing at 3.6-3.7
After day 14, your fermentation is typically complete, though it may continue slowly. Keep your cabbage submerged in brine and refrigerated for ideal preservation. Regular monitoring confirms successful fermentation throughout these stages.
Checking Fermentation Progress
You'll know your fermentation is active when you spot bubbles rising to the surface and foam forming on top, especially during the first few days.
Check your jar's pressure daily by gently tapping the sides to release trapped CO2 bubbles, which helps you gauge fermentation activity.
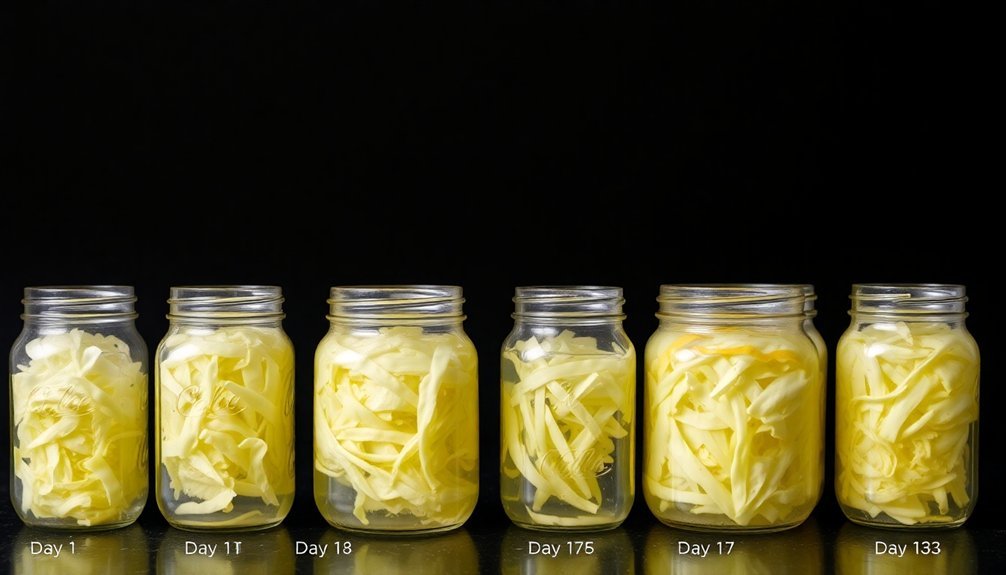
As the process continues, you'll notice the brine level fluctuating with temperature changes and the cabbage becoming more translucent, indicating proper fermentation progress.
Visual Signs of Activity
Monitoring visual signs of fermentation helps guarantee your sauerkraut is progressing correctly through each stage. During the first three days, you'll notice tiny bubbles rising to the surface as L. Mesenteroides bacteria begin converting sugars to lactic acid.
The brine level will fluctuate with temperature changes, and white sediment at the jar's bottom is perfectly normal.
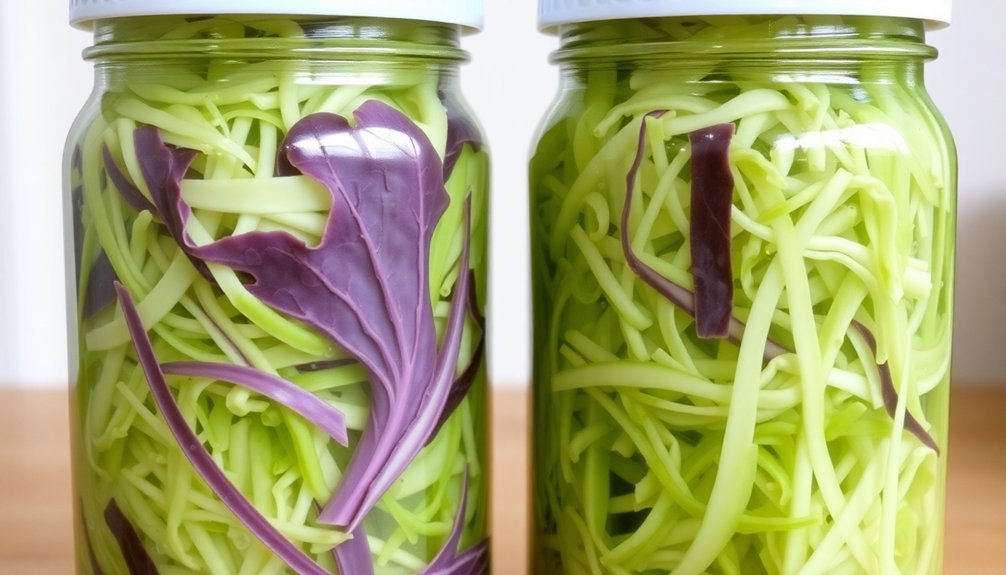
As fermentation progresses from day 4 to 7, you'll observe the bubbling slow down while the brine becomes cloudy. The cabbage will lose its bright appearance and become more translucent. If you're using red cabbage, you'll see it shift from blue-purple to a more distinct red-purple hue.
Here's what to watch for throughout the process:
- Tiny bubbles rising consistently during initial fermentation
- Cloudy brine and translucent cabbage developing by mid-week
- White film on the surface that should be removed immediately
- Reduced bubbling activity as fermentation nears completion
Testing Jar Pressure Daily
Throughout the fermentation process, daily pressure checks serve as a critical indicator of your sauerkraut's progress. You'll notice distinct pressure changes that signal different fermentation stages, from initial CO2 buildup to completion.
To effectively monitor jar pressure, gently tap the lid daily and observe any movement or resistance. You'll need to release excess pressure to prevent jar damage while maintaining enough to continue fermentation. Keep the jar at 65-75°F (18-24°C) for the best pressure development.
| Day | Pressure Level | Required Action |
|---|---|---|
| 1-3 | Slight | Monitor brine rise |
| 4-6 | Moderate | Check for bubbles |
| 7-9 | High | Release excess gas |
| 10-12 | Peak | Watch for overflow |
| 13-14 | Decreasing | Prepare for completion |
During the first week, you'll observe increasing pressure as CO2 production intensifies. By day 7, expect pronounced pressure and visible bubbling. Around days 10-12, fermentation reaches its peak activity with strong pressure buildup. As you approach day 14, you'll notice decreasing pressure, indicating fermentation is nearly complete. Remember to maintain proper salt concentration and container integrity throughout this process to guarantee safe fermentation.
Achieving Peak Flavor
The final stage of cabbage fermentation typically begins around day 16, when *L. pentoaceticus (L. brevis)* bacteria take over to develop a more complex flavor profile.
During this critical phase, you'll notice your sauerkraut becoming tangier as beneficial bacteria continue producing lactic acid, further lowering the pH levels. The fermentation process will naturally end once all available sugars are consumed, typically around day 21.
To achieve the best results during this final stage, maintain a consistent temperature between 65°F and 70°F (18-21°C). You'll want to avoid temperatures above 90°F (32°C), as they'll speed up fermentation but compromise flavor complexity.
Here's what you can expect during peak flavor development:
- Your sauerkraut will develop a slightly softer texture while maintaining its crunch
- The flavor will become more complex and tangy as lactic acid levels increase
- The pH will continue to drop, creating an ideal preservation environment
- Bubbling activity will gradually decrease as sugars are depleted
This final stage is vital for achieving that perfect balance of flavors, and you'll know it's complete when the fermentation activity slows substantially and the taste reaches your desired level of tanginess.
Final Fermentation Stage
During the final fermentation stage, lasting approximately 5-7 days, you'll notice several key changes that signal the completion of your sauerkraut. The most obvious indicator is the cessation of bubbling activity, while the lactic acid concentration reaches its peak of 2-2.5%.
You'll find that Lactobacillus brevis and Lactobacillus pentoaceticus are the dominant bacteria during this period.
Temperature control remains vital at this stage. You'll need to maintain temperatures between 60°F and 70°F, as fluctuations beyond 5 degrees can disrupt the fermentation process. If your fermentation environment drops below 58°F, you'll risk slowing the process and potentially allowing harmful bacteria to thrive.
You'll know your fermentation is complete when you observe several factors working together: the absence of bubbles along the sides and top of your jar, a stable acidic pH, and the complete consumption of available sugars. Your cabbage will have transformed to a softer texture with a pronounced sour taste.
Remember that proper moisture levels, salt concentration, and minimal oxygen exposure are still essential during this final stage to guarantee the best results.
Long Term Storage Methods
Once you've completed the fermentation process, you'll need to choose from three proven storage methods to preserve your sauerkraut: refrigeration, freezing, or canning. Each method offers distinct advantages depending on your storage goals and how you'll use the sauerkraut later.
For refrigeration, keep your sauerkraut in a tightly sealed container at 32-40°F (0-4°C). While the fermentation will continue slowly, you can store it this way for several months.
Freezing completely halts fermentation and requires proper headspace in your containers, while canning kills the beneficial cultures but offers the longest shelf life of up to one year.
Regardless of your chosen method, follow these essential storage practices:
- Always use clean, sterilized containers to prevent contamination
- Label containers with the date and contents for easy tracking
- Store away from direct light and heat sources
- Check regularly for signs of spoilage like mold or off odors
Remember to leave ½ inch (13 mm) of headspace when using freezer containers or canning jars. This prevents expansion from damaging your containers and guarantees proper preservation.
Frequently Asked Questions
Can I Ferment Cabbage Without Salt?
Yes, you can ferment cabbage without salt. You'll need to use natural cabbage juices, filtered water, and spices like caraway or celery seeds. It'll take longer to ferment, about 5-7 days.
Why Does My Fermented Cabbage Taste Fizzy or Effervescent?
Your fermented cabbage tastes fizzy because beneficial bacteria are actively consuming sugars and producing carbon dioxide during fermentation. This natural process creates the effervescent sensation you're experiencing when eating the cabbage.
Is It Normal for White Film to Appear on Top?
While white film isn't ideal, it's common during fermentation. You'll want to remove it as it appears and make certain your cabbage stays submerged. Don't worry – it's usually harmless if you handle it properly.
Should I Remove the Dark Spots That Develop on Cabbage Leaves?
Yes, you'll definitely want to remove any dark spots from cabbage leaves before starting fermentation. They can harbor harmful bacteria and affect the quality of your ferment. Cut them out with a clean knife.
Can I Mix Different Types of Cabbage in One Fermentation Batch?
Yes, you can mix different cabbage types in one fermentation batch. Red and green cabbage work well together, though the red will tint everything pink. You'll get unique flavors and beautiful colors in your final product.
In Summary
You've now completed your two-week cabbage fermentation journey. Once you're satisfied with the taste and texture, transfer your sauerkraut to airtight jars and refrigerate. It'll keep for several months when properly stored. Don't forget to save some starter brine for your next batch. With practice, you'll develop an intuition for the perfect fermentation timing that suits your taste preferences.


Leave a Reply