Building a safe underground pantry bunker requires careful planning and execution. You'll need to start by checking local regulations and calling 811 to verify utility lines. Choose a location with natural drainage and excavate at least 8 feet deep at a 2-degree angle. Install proper drainage systems and use reinforced concrete with rebar grid patterns for foundation strength. Don't forget waterproofing layers and ventilation systems to maintain ideal storage temperatures between 32-41°F. Include heavy-duty blast doors and multiple entry points for safety. The success of your bunker depends on getting these essential elements right from the start.
Location and Site Assessment
A well-chosen location forms the foundation of a successful underground pantry bunker.
You'll need to carefully evaluate several factors to guarantee your site meets both practical and legal requirements. Start by reviewing the accessibility of your chosen spot, making sure it's within reasonable distance from your main residence and can be reached easily by foot or vehicle. Structures measuring under 200 square feet typically don't require building permits.
Your site's environmental conditions play a vital role. Check the water table depth to prevent flooding issues, and examine the area for natural gas pockets that could pose safety risks.
You'll also want to take into account how local climate patterns might affect your bunker's stability and maintenance needs.
The terrain's geological makeup is equally important. You must verify that the soil can support your bunker's weight and won't be prone to erosion or landslides.
Look out for tree roots that could interfere with construction or compromise structural integrity over time.
Don't forget about legal compliance. You'll need to secure proper building permits and guarantee your project adheres to local regulations for underground structures.
Check if you need additional permits for grading or if your location affects protected land before breaking ground.
Ground Preparation and Drainage
You'll need to establish proper drainage slopes by excavating the site at a 2-degree angle and installing French drains to direct water away from your underground pantry.
Before starting any digging work, conduct essential soil tests to check for proper drainage, stability, and composition, which will help determine the excavation depth and required reinforcement.
For ideal temperature control and storage conditions, dig at least 6 feet deep, ensuring you've allowed enough space for the 6-8 inch gravel base layer and sufficient headroom for comfortable movement. The optimal temperature for food preservation occurs at 10 feet underground, providing the most stable environment for extending shelf life of stored items.
Proper Drainage Slope Methods
Proper slope design stands as the foundation for effective underground pantry drainage. You'll need to carefully grade your sub-base to direct water flow downhill, ensuring your stored supplies remain dry and protected. When establishing slopes, don't exceed 80% of your bunker sand's angle of repose to maintain structural stability. Consulting experts during installation will maximize protection against water damage.
| Slope Component | Specification | Key Consideration |
|---|---|---|
| Drainage Pipes | 12ft max spacing | Install at downslope terminus |
| Pipe Size | 4+ inches | Must include drainage slots |
| Base Material | Pea gravel | Apply with geotextile fabric |
| Compaction | Smooth, even | Prevents water pooling |
Your drainage system's effectiveness depends on proper pipe placement and gravel distribution. Install perforated drainage pipes in excavated trenches, surrounding them with gravel to optimize water flow. You'll want to maintain consistent spacing between pipes, keeping them no more than 12 feet apart from each other or the bunker's edge. Apply a geotextile fabric liner to prevent sediment from compromising your drainage system's effectiveness. Finally, stabilize the gravel layer using a pre-polymer spray, which helps maintain the drainage slope's integrity over time.
Essential Soil Testing Steps
Before breaking ground on your underground pantry, thorough soil testing provides the foundation for a successful drainage system.
You'll need to start with a Standard Penetration Test (SPT) to understand your soil's resistance and layering, which directly affects drainage capabilities. This involves driving a sample tube into the ground to assess soil strength at different depths.
Follow up with a Cone Penetration Test (CPT) to measure soil cohesion and friction angles. This test offers real-time data that's essential for determining how water will move through your soil layers.
For clayey soils, you'll want to perform a Vane Shear Test to evaluate soil stability and shear strength, as clay can greatly impact drainage patterns.
Don't skip Ground Penetrating Radar (GPR) scanning, as it'll help you identify underground obstacles or voids that could compromise your drainage system.
Collect undisturbed soil samples using Shelby tubes for laboratory testing of permeability and compressibility. These results will guide your drainage design decisions and help you determine proper slope angles and necessary waterproofing measures for your underground pantry's long-term stability.
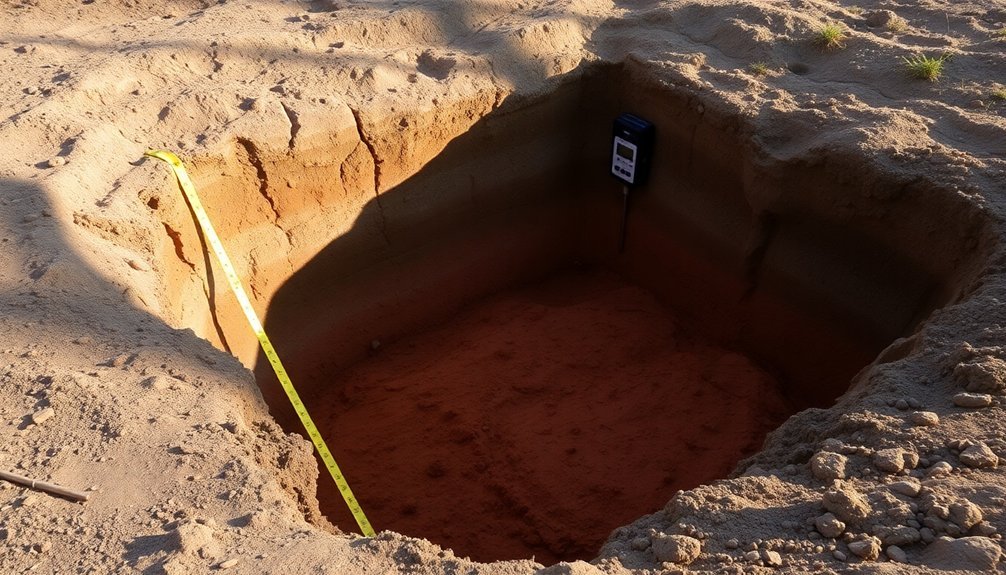
Excavation Depth Guidelines
Determining the right excavation depth stands as the cornerstone of a secure underground pantry. You'll need to dig at least 8 feet deep to guarantee adequate protection, though local conditions might require adjustments.
Before breaking ground, it's essential to evaluate your site's characteristics and confirm you're following local building codes.
Your ground preparation process should start with a thorough site assessment. You'll want to avoid areas near water bodies and dense root systems that could compromise your shelter's integrity.
Don't forget to call 811 to verify there aren't any utility lines where you plan to dig.
Here are three important drainage considerations for your underground pantry:
- Install a complete drainage system with gravel at the base to prevent water pooling.
- Use moisture-resistant materials throughout the construction process.
- Position dehumidifiers strategically to maintain ideal humidity levels.
Remember to implement proper shoring techniques as you dig, using either sloping, benching, or trench shields to prevent cave-ins.
It's best to use an excavator for precise digging, and always clear away loose material promptly to maintain a safe working environment.
Creating a Strong Foundation
You'll need to install a proper drainage system with gravel before laying your foundation to prevent water accumulation and structural damage.
Next, create a sturdy rebar grid throughout the foundation area, ensuring proper spacing and overlap for maximum strength.
Finally, pour your concrete in a single, level layer while maintaining consistent thickness and allowing sufficient time for proper curing.
Proper Drainage First
A rock-solid drainage system forms the cornerstone of any underground pantry bunker's success.
You'll need to start by excavating your site to the proper depth, keeping flash floods and water table levels in mind. Once you've leveled the bottom, lay down a 6-8 inch gravel layer that acts as your first line of defense against water infiltration.
Install a thorough French drain system using 4-inch perforated pipes around the bunker's perimeter. You'll want to bury these pipes 12 inches deep, guaranteeing they slope toward daylight for proper water flow.
Don't forget to take into account adding a vertical drainage pipe for potential sump pump installation.
Here are three essential drainage elements you can't overlook:
- Create strategic berms around your bunker to direct surface water away from the structure
- Install a non-perforated drainage pipe where needed to control water flow direction
- Grade the surrounding area to confirm water naturally flows away from your bunker
Remember to stabilize the soil during excavation by misting it with water and use temporary supports if needed.
Your drainage system's success depends on proper installation and attention to these vital details.
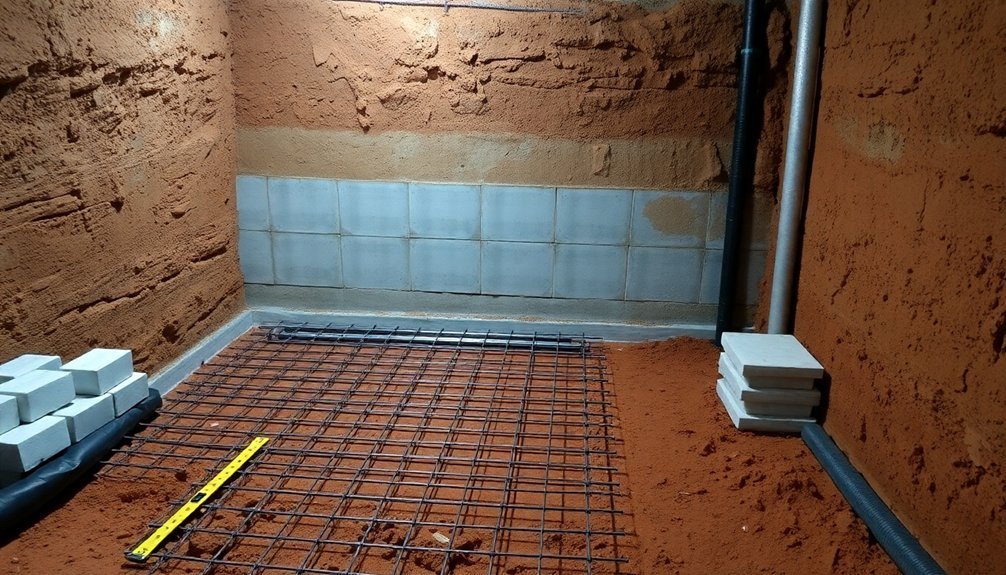
Rebar Grid Installation
Strong bones make a strong body, and rebar makes a strong bunker. Creating a proper rebar grid is essential for your underground pantry's structural integrity.
You'll want to place #5 rebar (⅝" diameter) in a grid pattern, spacing the bars 16 inches apart both horizontally and vertically.
Start by cutting your rebar to the necessary lengths using a manual rebar cutter. You'll need to position spacers or rebar chairs to keep the steel grid elevated from the ground and centered within the concrete.
Wire the horizontal and vertical pieces together at each intersection point to create a sturdy mesh that won't shift during the concrete pour.
When installing the grid, secure it firmly within your plywood forms using vertical 2×4's for support.
You'll want to pour your concrete in stages, typically 10-15 feet at a time, to prevent cave-ins. Make sure you're tying new rebar sections to existing ones during subsequent pours to maintain structural continuity.
Keep the concrete misted during curing to prevent cracking, and don't remove the forms until the concrete has fully cured.
Level Concrete Pour Basics
With a rock-solid foundation serving as your bunker's backbone, precise concrete pouring becomes the crucial next step.
You'll start by pouring the concrete from one end, working methodically across your prepared slab area. As you pour, you'll need to use a screed board resting on your forms, moving it in a sawing motion to guarantee an even surface throughout the entire foundation.
For a professional-grade underground pantry foundation, follow these critical steps:
- Pour the concrete systematically, maintaining a consistent flow while watching for any low spots or areas that need additional material.
- Level the concrete immediately using your screed board, working in sections to prevent the mixture from setting before you've achieved proper leveling.
- Finish the surface according to your needs – use a trowel for a smooth finish if you're planning to add floor coverings later, or create a textured surface with a broom if you want additional traction.
Allow your concrete to cure for 24-48 hours, depending on your climate and the manufacturer's specifications.
During this time, you'll want to periodically check the level to guarantee your foundation remains perfectly flat as it sets.
Wall Support Systems
Building secure walls for your underground pantry bunker requires careful attention to support systems that prevent cave-ins and structural failures. Start by implementing protective measures during excavation, including proper sloping or benching of the trench walls. You'll need to install a shoring system to keep soil in place while construction progresses.
For wall materials, you've got several reliable options. Reinforced concrete offers excellent load-bearing capacity at a reasonable cost, while metal sheeting provides durability and water resistance when properly insulated. Adding a brick layer inside metal walls creates an effective composite structure. Make sure your walls are 1-3 feet thick to protect against shockwaves and radiation.
Don't skip on structural reinforcement. Install metal beams across the trench and create a solid concrete foundation. Add rebar to concrete as it sets, and use concrete forms to achieve the necessary wall thickness.
For ceiling support, install sturdy beams to prevent roof collapse. If you're using a shipping container, strengthen it with gabion cages or welded steel bars. Remember to add an extra outer layer of reinforced concrete for maximum protection and longevity.
Temperature Control Methods
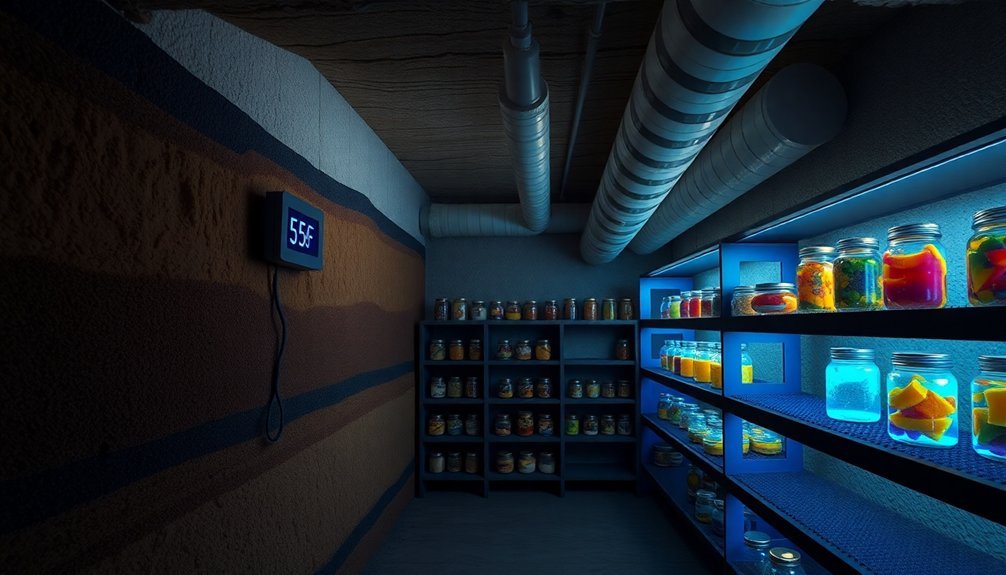
You'll want to design your underground pantry bunker with strategic air vents that create natural cross-ventilation, helping maintain the perfect 32-41°F storage temperature range.
The earth's thermal mass works to your advantage, as it naturally keeps temperatures cooler in summer and warmer in winter, especially at depths of 10 feet where temperatures stay consistently between 50-60°F.
Natural Airflow Design Methods
Natural airflow systems consistently provide the most cost-effective and reliable ventilation for underground pantry bunkers.
You'll need to implement both wind-driven and temperature-based ventilation strategies to maintain proper air circulation. By installing wind inducers with carefully designed vanes that meet at equal angles, you can capture and direct wind from any direction into your shelter, even with winds as low as 6-8 mph.
To maximize natural airflow efficiency, you'll want to:
- Position inlet and exhaust ducts strategically to create pressure differences, ensuring your ducts work with rather than against prevailing winds.
- Install clerestory windows or vented skylights that function as solar chimneys, helping stale air escape while drawing fresh air through lower openings.
- Create temperature differentials using stack heaters in exhaust ducts when natural temperature differences aren't sufficient.
Don't forget to incorporate transom windows or louvers between rooms to complete the airflow circuit.
If you're in a low-humidity climate, consider adding a cool tower system to enhance ventilation.
For complex layouts, it's worth investing in CFD modeling to optimize your airflow design before construction begins.
Earth's Thermal Mass Benefits
Throughout the year, earth's remarkable thermal mass properties provide one of the most effective natural temperature control systems for underground pantry bunkers.
You'll benefit from the earth's natural ability to maintain steady temperatures, as soil temperatures typically lag behind air temperatures by 3 to 6 months, giving you cooler conditions in summer and warmer conditions in winter.
When you build your bunker deep enough, you'll reach a point where the temperature remains constant year-round, averaging your area's summer and winter temperatures.
This stability means you won't need extensive heating or cooling systems. Your underground pantry will naturally resist temperature fluctuations through amplitude dampening, while phase shifting delays the impact of external temperature changes on your storage space.
You can enhance these natural benefits by incorporating materials with high specific heat capacity, similar to traditional root cellars.
Consider adding thermal mass materials like cement to your construction, and if you're in a colder climate, you'll want more insulation near the top of your walls where the ground temperature fluctuates most.
The deeper sections will need less insulation since the soil temperature remains more stable at greater depths.
Humidity Control Techniques
Maintaining proper humidity levels in your underground pantry bunker requires an all-encompassing approach that combines ventilation, waterproofing, and monitoring systems.
You'll need to install dual vents – one near the ceiling and another at ground level – to create natural air circulation that prevents mold growth while maintaining ideal humidity levels.
To effectively control moisture, start with proper waterproofing during construction. Apply a waterproof membrane to the exterior walls and use seal coatings to prevent water infiltration.
Don't forget to protect your electrical systems by sealing all conduits, and install a reliable drainage system with a gravel base or sump pump.
Here are three essential dehumidification methods you can implement:
- Install a mechanical dehumidifier with backup power sources
- Set up a well water cooling system using 72°F water through condensation coils
- Use chemical absorptive agents as a backup moisture control method
Monitor your bunker's conditions regularly using thermometers and hygrometers.
You'll want to maintain humidity levels between 80-95% for root vegetables and 80-90% for fruits.
Check frequently for signs of mold or dampness, and test your storage system with small batches of produce before storing larger quantities.
Waterproofing Your Underground Storage
Water infiltration poses one of the biggest threats to an underground pantry bunker, making proper waterproofing essential for long-term storage success. You'll need to implement multiple waterproofing methods to guarantee your storage stays dry and protected.
Start with proper surface preparation by thoroughly cleaning the concrete structure and repairing any existing cracks. Apply a primary waterproofing layer using either membrane, integral, or crystalline methods. For membrane waterproofing, you can use bituminous or polyurethane coatings, while integral waterproofing requires adding water-repellent admixtures during construction.
Wrap the entire structure with heavy-duty landscape plastic as an additional barrier. Don't skip creating external and internal chamfers between the raft and retaining walls to prevent water accumulation. Install swellable bars in retaining wall joints and use injection waterproofing for any small cracks or crevices.
Apply cementitious waterproofing or plaster with specialized admixtures for an extra layer of protection. Once you've completed the waterproofing process, conduct a flood test to verify effectiveness. Properly backfill around the structure, guaranteeing the soil is well-packed to maintain the waterproofing system's integrity.
Building a Safe Entry
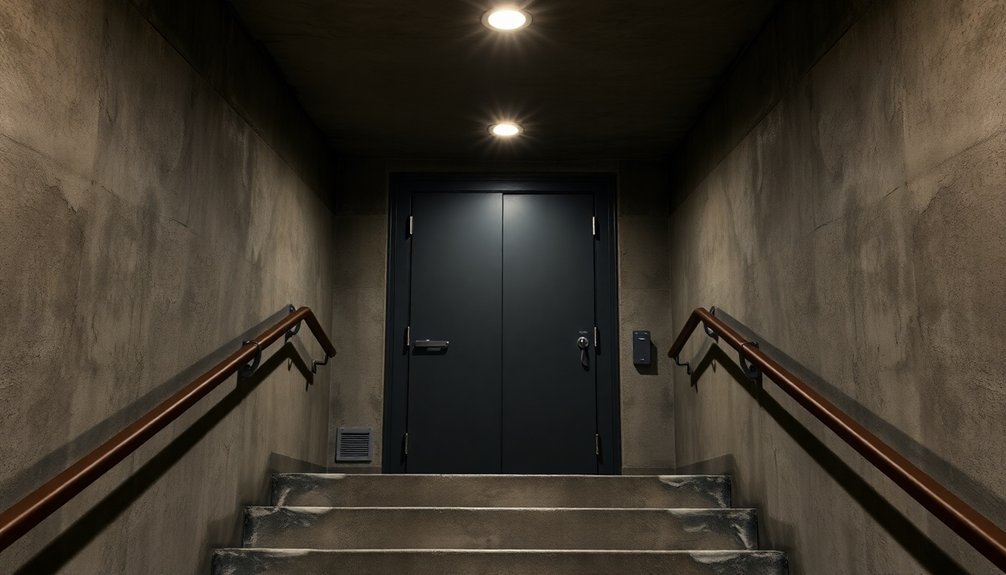
A safe entry's design serves as your bunker's first line of defense against both intruders and natural threats. You'll want to incorporate bullet-resistant materials, including 1/2-inch plate steel for the doors and surrounding walls.
Consider implementing a concealed entry point, such as a false wall or bookshelf, to keep your bunker's location hidden from potential threats.
For maximum security, you'll need to focus on these critical elements:
- Install heavy blast doors with double-lined 1/2-inch plate steel and a 2-foot plate deadbolt system, complemented by hidden locking mechanisms and sliding deadbolts for interior securing.
- Reinforce the door frame by using steel studs instead of wooden ones, and guarantee all screws anchor directly into the rough frame.
- Create a multi-layered protection system by building an above-ground "safe house" that shields your bunker's entrance.
Don't forget to integrate emergency access considerations into your design. You can connect the bunker to your home's basement for quick access or create separate entry and exit points that allow people to come and go without compromising those inside.
Remember to maintain the same level of security for both entrance and exit points.
Ventilation Design and Installation
Proper ventilation stands as the lifeline of any underground pantry bunker, requiring careful planning and strategic implementation.
You'll need to install dual ventilation vents on opposite sides of your bunker, with the exhaust vent near the ceiling and intake vent near the floor to create ideal airflow patterns.
For construction, use PVC Schedule 40 tubing for both intake and exhaust systems. This material offers excellent durability and resistance to moisture.
You'll want to guarantee tight seals throughout the system and consider adding screens to prevent unwanted pests from entering. Installing electric fans can enhance airflow when natural circulation isn't sufficient.
Take advantage of natural temperature differentials by positioning your vents strategically. You can improve airflow by using stack heaters in exhaust ducts during periods of minimal temperature difference.
Wire racks on your shelving will help maintain consistent air circulation throughout the space.
Maintain temperatures between 32-40 degrees F and humidity levels of 85-95% for ideal storage conditions.
You'll need to regularly check your ventilation system and adjust it based on seasonal changes.
Remember to include closure mechanisms for your vents during winter months when necessary.
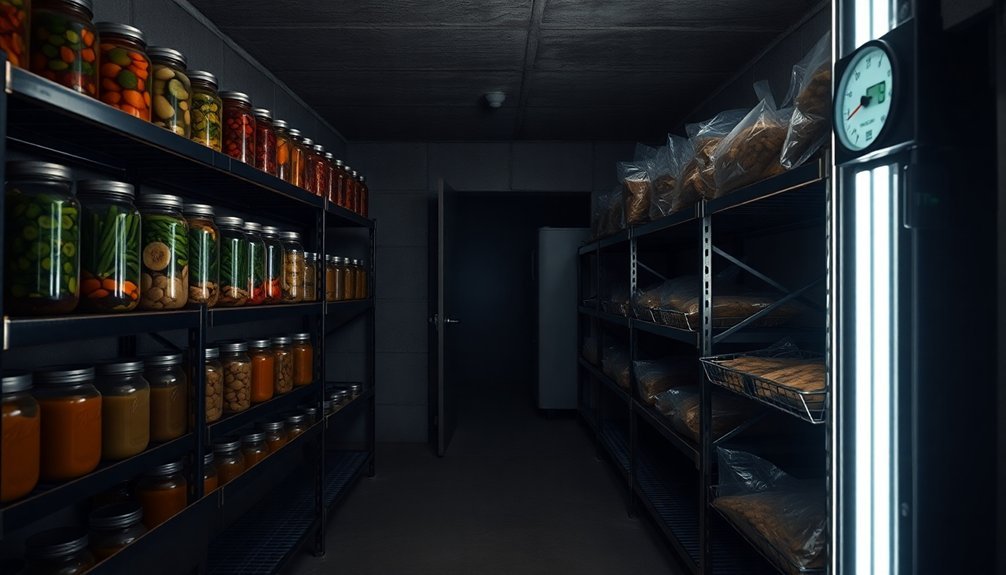
Storage Layout Planning
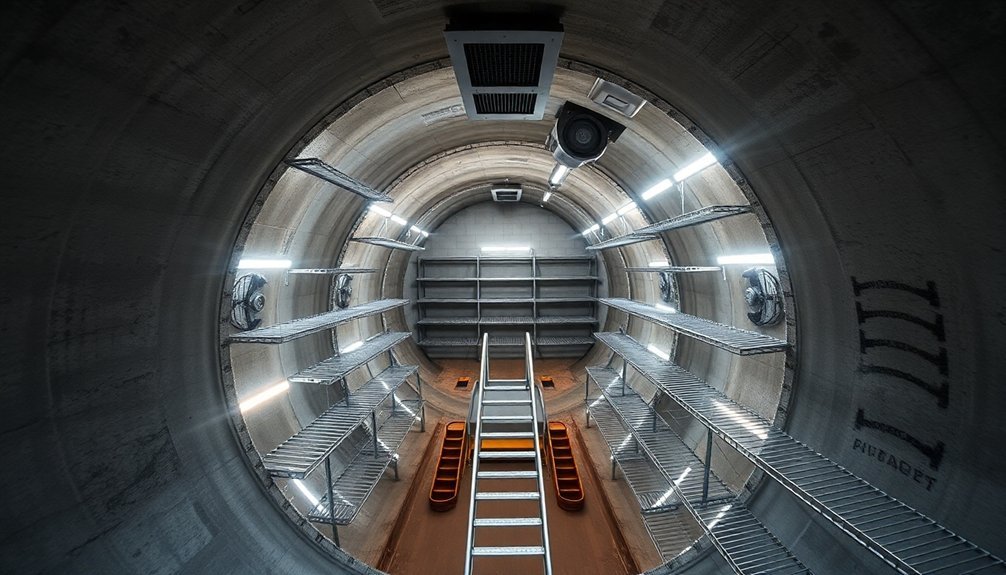
Strategically organizing your bunker's storage layout guarantees maximum efficiency and preservation of your stored goods.
You'll want to arrange your shelving vertically to maximize space while guaranteeing proper airflow between boards. Using untreated cedar shelving prevents chemical contamination and naturally resists insects and mold.
Create distinct storage zones based on temperature requirements. Place root vegetables like beets and carrots in the coldest areas, typically on lower shelves, while storing squash and tomatoes in warmer sections higher up.
Install monitoring gauges to track temperature and humidity without frequently opening the bunker.
Key elements for an effective storage system:
- Label all shelves and bins with contents, storage dates, and expected shelf life to maintain an organized inventory system.
- Install proper lighting and keep a sturdy step ladder nearby for safe access to higher shelves.
- Use food-grade storage bins for smaller items and guarantee they're properly spaced for air circulation.
Remember to implement a rotation system that guarantees older items are used first.
Regular maintenance checks will help identify potential issues before they affect your stored goods, while proper organization makes inventory management more efficient.
Essential Safety Features
While organizing your storage layout sets the foundation for an efficient bunker, implementing robust safety features guarantees your survival space remains secure and inhabitable during emergencies.
You'll need to focus on both structural integrity and protection against various threats.
Start with the physical structure by using reinforced concrete with at least 12 inches of 4,000 PSI strength to shield against earth movement and falling debris.
Install gas-tight, waterproof doors to prevent contamination from biological and chemical agents. Your ventilation system should include advanced air filtration to protect against radioactive particles and other airborne threats.
Don't overlook entrance security – incorporate L-shaped entryways and sophisticated access controls like biometric scanners or security codes.
You'll want to ascertain all airpipes are tamper-proof and entrances remain concealed from potential intruders.
For long-term sustainability, install reliable power generators and waste management systems.
Include monitoring equipment to track external threats like radiation levels and air quality.
Set up redundant communication systems to maintain contact with the outside world.
These features work together to create a secure environment that can sustain you through extended periods of isolation.
Frequently Asked Questions
How Long Will Stored Food Last in an Underground Pantry Bunker?
Your stored food's shelf life depends on temperature control (32-40°F), humidity levels (80-90%), and proper packaging. You'll get months to years of storage when you maintain these conditions in your underground space.
What Is the Average Cost per Square Foot for Construction?
You'll typically spend between $200 to $400 per square foot for bunker construction. Your total costs can vary based on whether you choose prefabricated or custom-built options, and your specific site requirements.
Can Multiple Underground Bunkers Be Safely Connected Together?
Yes, you can safely connect multiple bunkers using reinforced tunnels. You'll need proper structural support, ventilation systems, and emergency exits. Make sure to include watertight seals and maintain consistent ground stability between structures.
Are Special Permits Required for Building an Underground Pantry Bunker?
Yes, you'll need special permits to build an underground bunker. Contact your local government to learn specific requirements, as permits vary by location. Failing to obtain proper permits can result in fines and legal issues.
How Do You Protect Against Radon Gas in Underground Storage Spaces?
You'll need proper ventilation, gravel beneath the floor, polyethylene sheeting as a barrier, sealed foundations, and continuous radon monitoring. Install a gas-tight venting pipe from ground level through to the roof for safety.
In Summary
You've now got the knowledge to build a secure underground pantry bunker that'll protect your food supplies and provide peace of mind. Remember to regularly check your drainage, ventilation, and temperature control systems. Don't skimp on safety features or structural integrity. With proper maintenance and organization, your underground pantry bunker will serve as a reliable storage solution for years to come.


Leave a Reply