To make crispy apple cider vinegar pickle spears, start with fresh Kirby or Boston Pickling cucumbers cut into uniform spears. You'll need clean 16-ounce mason jars, basic kitchen tools, and a simple brine of equal parts apple cider vinegar and water. For each cup of liquid, add 2 tablespoons salt and 1 tablespoon honey. Pack your cucumber spears tightly in sterilized jars with fresh dill, garlic, and mustard seeds, then pour the cooled brine over them, leaving ½ inch headspace. They'll be ready to eat in 2-3 weeks when stored properly. There's so much more to discover about perfecting your pickling technique.
Why Apple Cider Vinegar
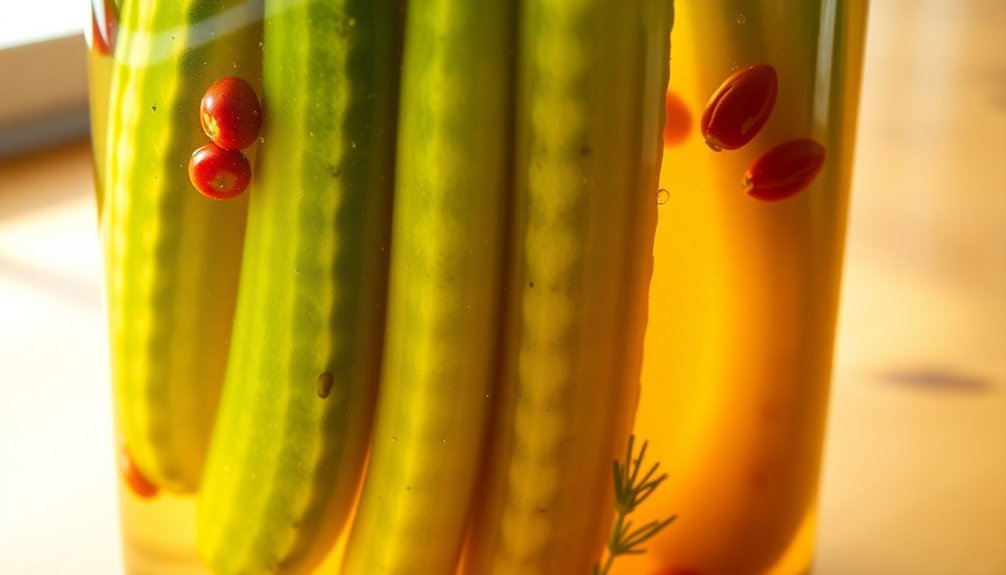
For generations, apple cider vinegar has been a go-to choice for pickle-making enthusiasts seeking a more nuanced flavor profile. When you're crafting pickle spears, you'll find that apple cider vinegar offers a softer, more complex taste compared to white vinegar, featuring subtle woody depths and a perfect balance of sweet and tart notes. For effective preservation, you must maintain at least 5% acidity.
You'll appreciate how apple cider vinegar naturally enhances other pickling ingredients like dill, garlic, and mustard seeds without overwhelming them. It's versatile enough to pickle various vegetables while eliminating the need for additional sugar in many recipes. The vinegar's gentler approach means you won't encounter that sharp, aggressive bite often found in traditional pickles.
What's more, you're getting significant health benefits with every bite. The vinegar contains beneficial compounds like acetic acid, which helps regulate blood sugar levels, and if you're using raw, unpasteurized varieties, you'll get the added bonus of probiotics from "the Mother."
Your pickles will develop a unique, appealing hue, and you can easily adjust the brine's sweetness and acidity to match your taste preferences.
Choosing Perfect Pickling Cucumbers
Now that you understand the unique benefits of apple cider vinegar, selecting the right cucumbers will make or break your pickle-making success.
Look for cucumbers with thin skin and firm, dry flesh, as these characteristics guarantee better brine absorption while maintaining that satisfying crunch. The ideal size ranges from 1.5 to 6 inches long, with blunt ends that'll fit snugly in your jars. The Kirby type variety, developed in the 1920s, remains one of the most popular choices for pickling.
For beginners, Boston Pickling cucumbers are an excellent choice. They're ready in 55 days and offer resistance to common diseases like downy mildew and scab.
If you're working with limited space, try the H-19 Little Leaf variety, which features a compact growth habit while still delivering 3-4 inch fruits.
When harvesting, don't wait too long – pick your cucumbers while they're still small and firm. You'll want to check them daily once they start producing, as oversized cucumbers become bitter and spongy.
If you're growing vining varieties like National Pickling or Calypso, consider using a trellis for easier access.
Essential Equipment For Success
You'll need a clean 16-ounce glass jar with a tight-fitting lid as your primary vessel for making pickle spears, though two 8-ounce mason jars can work just as well.
Your basic toolkit should include measuring cups and spoons, a sharp knife, cutting board, and a whisk or stirring spoon to properly mix your brine solution.
Keep a marking pen handy to label your jars with dates, and consider using a small tray in your refrigerator to catch any potential spills during the fermentation process.
[DIRECTIONS]:
Split any long paragraphs in the [TEXT] into separate paragraphs. Write the entire [TEXT] again, but with any long paragraphs split.
Retain any and all special formatting (e.g., markdown, bullet point lists, brackets, etc.), but do not add special formatting.
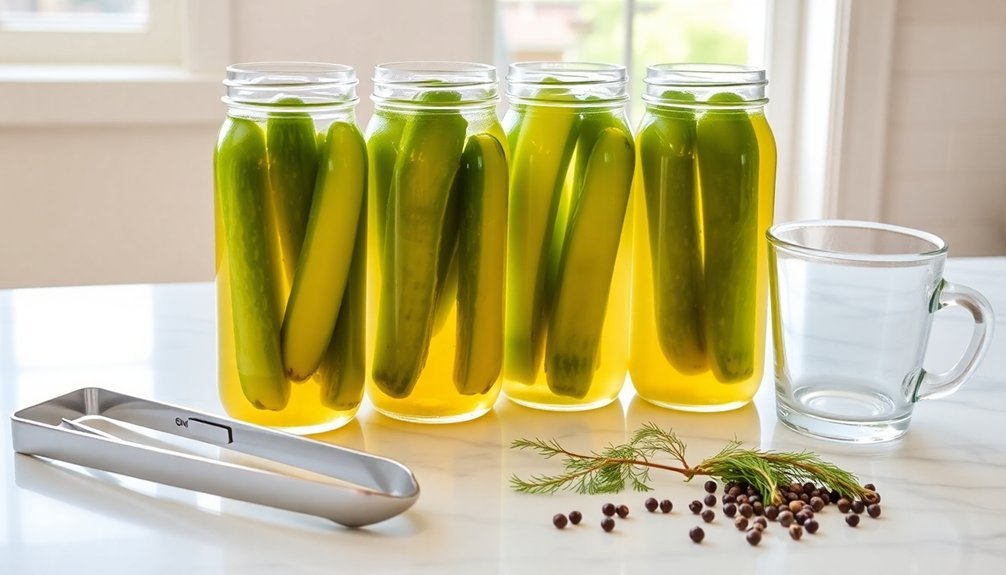
Required Jars And Lids
Picking the right jars and lids sets the foundation for successful pickle-making. You'll need glass jars, either 8 or 16 ounces, with wide mouths and flat metal tops with screw rings.
Before you begin, make sure you've properly sterilized all your jars and lids using dish soap or a specialized sanitizer like Star San to eliminate any harmful bacteria or yeast.
You'll want to determine how many jars you need based on your cucumber quantity and desired yield. When handling hot jars during the pickling process, use jar tongs to prevent burns.
Once you've filled your jars with cucumbers and brine, screw the lids on firmly to create an airtight seal. It's essential to check that each lid is properly sealed to prevent air from entering.
After filling, give each jar a gentle shake to distribute the spices evenly. Let the jars cool to room temperature before moving them to the refrigerator.
Don't forget to monitor your pickles regularly for any signs of spoilage or mold. Remember, proper jar selection and sterilization are key factors in ensuring your pickles stay fresh and safe to eat.
Basic Tools You Need
Beyond proper jars and lids, successful pickle-making requires a specific set of tools to guarantee precision and safety throughout the process.
You'll need non-reactive cookware for preparing the brine, such as a stainless steel saucepan, glass pot, or ceramic container. These materials prevent unwanted chemical reactions that could affect your pickles' taste and quality.
For preparation, gather a sturdy cutting board and sharp knives to slice your cucumbers uniformly. A garlic press will help you mince garlic efficiently, while a funnel prevents messy spills when pouring hot brine into jars.
You'll also need a whisk or spoon for mixing your brine solution thoroughly.
Safety equipment is essential when handling hot jars and liquid. Get a reliable jar lifter, heat-resistant gloves, and a trivet or heat-resistant mat.
You'll need a water canner or large pot for processing your filled jars. For cooling and storage, set up a cooling rack in a draft-free area and make sure you have enough refrigerator space.
Don't forget to label your jars with dates and ingredients – you'll thank yourself later when you're trying to identify different batches.
The Perfect Brine Recipe
You'll want to start with equal parts apple cider vinegar and water for a balanced pickle brine that's not too harsh.
For the best results, mix 2 tablespoons of salt and 1 tablespoon of honey or sugar per cup of liquid, ensuring they dissolve completely.
Keep your brine temperature below boiling—warm it just enough to dissolve the ingredients, then let it cool completely before adding to your vegetables.
Vinegar-to-Water Ratio Basics
The foundation of perfectly pickled spears lies in mastering the vinegar-to-water ratio. For beginners, start with equal parts apple cider vinegar and water – typically one cup of each. This balanced ratio creates a reliable brine that's neither too harsh nor too mild, while ensuring proper acidification for food safety.
You'll want to adjust the ratio based on your taste preferences and the vegetables you're pickling. A stronger vinegar concentration will speed up the pickling process and create a tangier flavor, while more water produces a milder result. Remember to use non-reactive containers to prevent any metallic taste from affecting your pickles.
Here are three essential steps for brine preparation:
- Measure your vinegar and water precisely using a kitchen scale for consistency.
- Bring the mixture to a boil to help dissolve spices and eliminate bacteria.
- Cool the brine completely before pouring over your cucumber spears.
Don't forget to add complementary spices like garlic, black peppercorns, and dill to enhance the flavor profile. While your pickles will be ready within hours, they'll develop better flavor after overnight refrigeration.
Salt and Sugar Balance
When combining your ingredients, make certain both salt and sugar dissolve completely in the brine before adding your spices and vegetables.
Use non-reactive utensils and pots to prevent any metallic flavors from seeping into your pickles.
The salt will draw moisture from your vegetables while the sugar balances the vinegar's acidity, creating perfectly crisp and flavorful pickle spears.
Brine Temperature Guidelines
Preparing the perfect pickle brine requires careful attention to temperature throughout the process. You'll need to balance the heat carefully when combining your apple cider vinegar and water mixture with the spices and salt. If you're using honey or sugar in your recipe, warm the mixture gently until these sweeteners dissolve completely.
For the safest results, follow these critical temperature steps:
- Bring your brine to a full boil to eliminate any harmful bacteria that could compromise your pickles' safety and shelf life.
- Allow the hot brine to settle briefly after boiling, reducing the risk of thermal shock to your jars.
- Cool the brine to a manageable temperature before pouring it over your cucumbers to prevent softening.
When filling your jars, use a funnel to prevent burns and spills while pouring the warm brine. You'll want to leave a small headspace at the top of each jar for proper sealing.
Once filled, gently shake the jars to distribute the spices evenly throughout the brine. Let your jars cool completely to room temperature before transferring them to the refrigerator, where they'll develop their signature tangy flavor over several days.
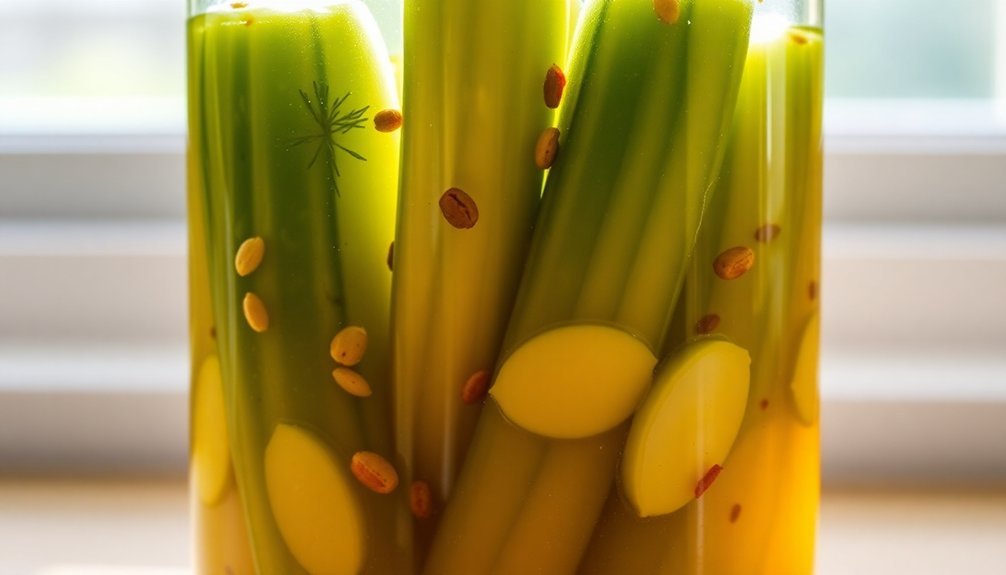
Preparing Your Pickling Spices
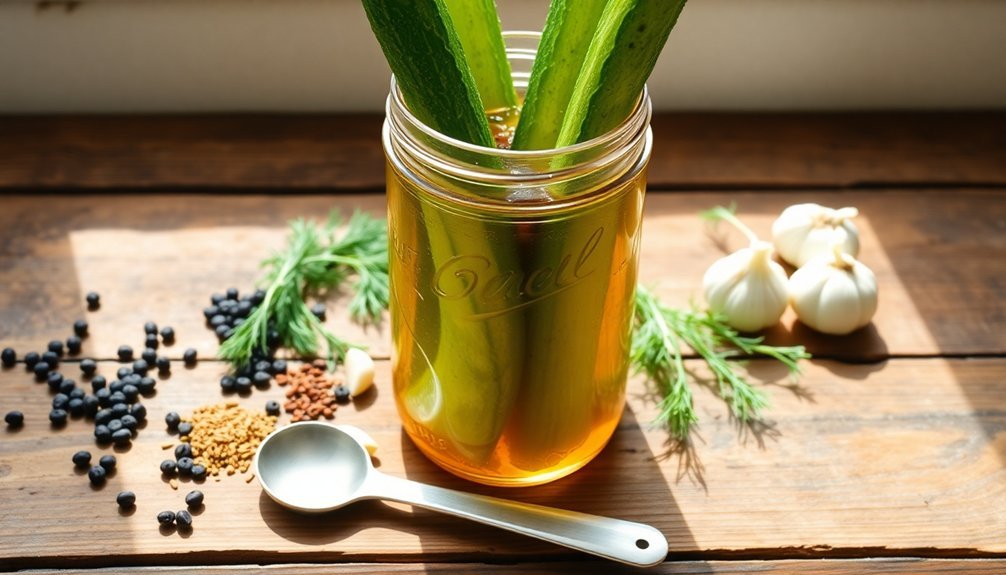
Creating your own pickling spice blend starts with gathering essential ingredients like mustard seeds, black peppercorns, and bay leaves.
You'll also need sweet spices such as allspice, cinnamon, or cloves, along with coriander seeds to form your base mixture. For a personalized touch, consider adding dill seeds, fennel seeds, or red chili flakes to customize the flavor profile.
To prepare your spices, start by crushing the cinnamon sticks and bay leaves into smaller pieces using a mortar and pestle. For enhanced flavor, roast your spices in a dry frying pan until they become fragrant.
Once cooled, combine all ingredients in a bowl, making sure to mix thoroughly for even distribution of flavors.
For apple cider vinegar pickle spears, you'll need about 2-3 tablespoons of your spice blend for a 32-ounce jar. If you're making a smaller batch, use 1½ teaspoons per pint.
Store any remaining spice mixture in an airtight container in a cool, dry place. Remember to give your spice blend a good shake before each use to prevent settling, and allow your pickles to sit for at least 1-3 days before tasting.
Cutting Techniques For Spears
You'll want to start by cutting your cucumbers into spears of equal thickness, as uniform pieces guarantee even pickling and consistent flavor throughout your batch.
When cutting spears, place your cucumber on a stable cutting board and use a sharp knife to first remove both ends, then slice lengthwise into halves before cutting each half into quarters or eighths.
Keep safety in mind by maintaining a firm grip on your knife and cucumber while cutting, and remember to trim any uneven edges before proceeding with the pickling process.
Uniform Size Matters
The precision of your cucumber spear cuts plays a crucial role in achieving pickle perfection. When you're slicing your cucumbers into spears, maintaining uniform size guarantees that each piece pickles at the same rate, delivering consistent flavor and crunch throughout your batch.
You'll want to pay careful attention to both the length and width of your spears, as inconsistent sizes can lead to some pieces becoming too sour while others remain bland.
For the best results, follow these essential steps:
- Remove both ends of the cucumber, paying special attention to the blossom end which can cause softening.
- Cut the cucumber in half lengthwise, then divide each half into equal quarters or eighths.
- Trim any uneven edges to maintain consistency before placing in your pickling jars.
You'll find that uniform spears not only create a more appealing jar presentation but also enhance the overall pickling experience.
Using the right tools, such as a sharp knife or mandoline, will help you achieve precise cuts. If you're feeling creative, consider using a crinkle cutter to add visual interest to your spears while maintaining size consistency.
Safe Slicing Methods
Safety stands paramount when slicing cucumbers into perfectly uniform spears. You'll want to start with a sharp, high-quality knife like a Super Parer, as dull blades can slip and cause accidents. Place your cucumber on a stable cutting board and make sure your work surface is clean and dry.
Begin by cutting off both ends of your cucumber. If you're not sure which is the blossom end, trim both sides – this step is essential as the blossom end contains enzymes that can make your pickles soggy.
Next, slice your cucumber in half lengthwise. From there, cut each half into quarters or eighths, depending on how thick you want your spears. Keep your cuts consistent and even to guarantee uniform pickling.
While you can use a mandoline, it's not necessary and can be dangerous if you're not experienced. Instead, focus on making clean, controlled cuts with your knife. Remember to leave the skin on – it adds texture and visual appeal to your finished pickle spears.
If you'd like a decorative touch, you can use a crinkle cutter or create stripped patterns with a peeler, though these steps are optional.
Packing Your Pickle Jars
Proper packing of pickle jars guarantees crisp, flavorful results and safe preservation. Before you begin, verify your jars are sterilized by simmering them in water above 180ºF for at least 10 minutes.
Once you've removed the jars with canning tongs, place them on a clean kitchen towel near your pickle brine.
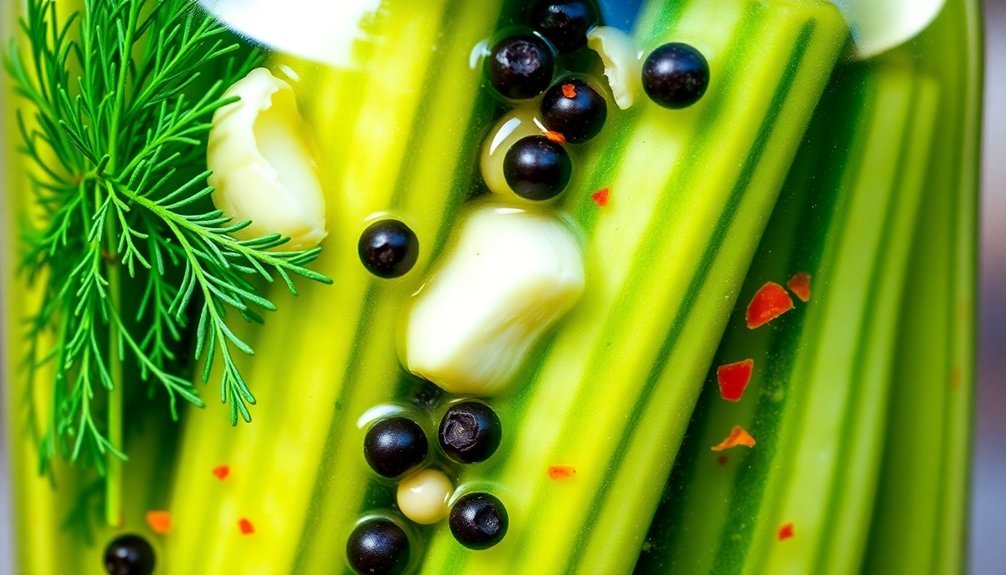
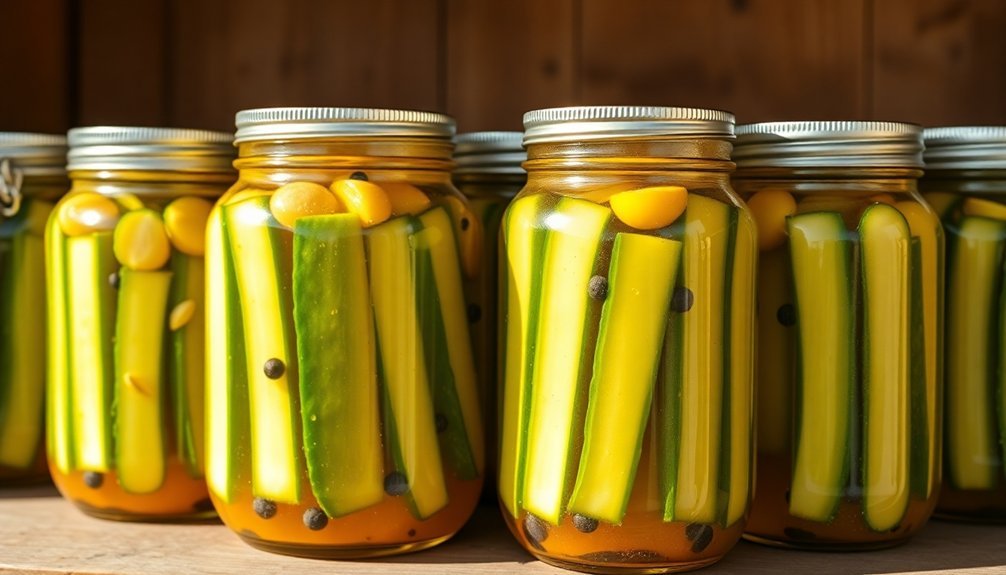
Pack your cucumber spears tightly into the jars, making sure you're leaving ½ inch of headspace at the top. Add your fresh dill, garlic cloves, and spices, distributing them evenly among the jars. You'll want to pour the hot pickling syrup over the cucumbers until they're completely covered.
For successful pickle preservation, follow these essential steps:
- Cover the filled jars with boiling liquid while maintaining the recommended headspace
- Adjust lids and rings firmly, making certain they're not over-tightened
- Process the jars in your boiling water canner at the specified temperature and time
After processing, remove the jars carefully and let them cool on a wire rack.
Check the seals after 24 hours, and store your properly sealed pickle jars in a cool, dark place.
Mastering The Cooling Process
Successfully cooling your pickling brine marks a critical step between preparation and preservation. Once you've removed your brine from heat, let it cool for 5-10 minutes while stirring occasionally to prevent salt and sugar from settling.
If you're short on time, you can speed up the process by placing your pot in a sink filled with cold water.
You'll want to verify your brine isn't too hot when you pour it over your cucumber spears. Hot brine can scald your vegetables, leading to mushy pickles instead of the crisp, crunchy texture you're aiming for. The cooling process also helps distribute flavors more evenly and reduces the risk of bacterial growth.
Once your brine has cooled enough to handle comfortably, pour it over your packed cucumbers and transfer the jars to your refrigerator.
You'll need to wait at least 24 hours before sampling your pickles, though longer storage allows flavors to develop more fully. Keep an eye on your pickles during storage, and plan to enjoy them within 2-3 weeks for the best quality and safety.
Storing Your Homemade Pickles
To maximize the shelf life of your homemade pickles, selecting the right storage container and location is vital. Choose glass mason jars or wide-mouth gallon containers, as they're ideal for maintaining freshness and preventing contamination. You'll want to avoid reactive materials that could affect your pickles' taste and quality.
Once your pickles are properly jarred, store them in a cool, dark, and dry location. Your pantry or kitchen closet works well, but keep them away from direct sunlight and heat sources. If you've made fermented pickles, they'll need a spot in your refrigerator to slow down the fermentation process.
For best storage success, follow these important steps:
- Confirm your pickles remain fully submerged in brine by using weights if necessary.
- Tighten lids securely, but remove rings after sealing for canned varieties.
- Check regularly for signs of spoilage, including odd smells or mold growth.
Your refrigerated pickles can last several weeks to months when stored properly. Remember that canned pickles need refrigeration once opened, and fermented varieties should always stay chilled to maintain their probiotic benefits and crispness.
Flavor Combinations That Work
Creating delicious apple cider vinegar pickles relies on three essential flavor components: the vinegar base, aromatic spices, and complementary seasonings.
You'll want to start with a balanced brine that combines apple cider vinegar with water, salt, and a touch of honey or sugar to mellow the acidity.
For classic dill pickles, combine fresh dill sprigs, mustard seeds, and halved garlic cloves with your brine.
If you're looking for a more complex flavor profile, add coriander seeds and black peppercorns to create depth.
Want something with heat? Include sliced jalapeños or red chili flakes.
You can explore Asian-inspired flavors by incorporating fresh ginger slices with your garlic and mustard seeds.
For a Mediterranean twist, try adding fresh rosemary or thyme along with fennel seeds.
Don't forget that you can layer flavors – try combining thinly sliced onions with your spices to add texture and taste.
Remember to maintain proper proportions: start with two to three garlic cloves, one tablespoon each of mustard seeds and peppercorns, and a few sprigs of fresh herbs per jar.
You can adjust these amounts based on your taste preferences.
Troubleshooting Common Issues
Pickle perfection can be challenging, even for experienced canners. When working with apple cider vinegar pickles, you'll want to watch for common issues that can affect your final product. If your pickles are shriveling or becoming soft, you're likely using too much vinegar or not keeping them fully submerged in the brine.
For successful pickle spears, focus on these critical areas:
- Brine Balance: Confirm your vinegar solution has 5% acidity and maintain proper sugar-to-salt ratios. You'll avoid bitter or overpowering flavors by carefully measuring your ingredients.
- Temperature Control: Don't store cucumbers in high temperatures during curing, and avoid overcooking your spices in the vinegar solution. This prevents both texture issues and bitter flavors.
- Contamination Prevention: Keep your pickles fully submerged in brine, remove any surface scum promptly, and always use fresh ingredients.
Store finished jars in a cool, clean environment after properly processing them in a boiling-water canner.
If you notice mold or unusual growth, don't take chances – discard the batch and start fresh, confirming you follow proper canning procedures and safety guidelines.
Frequently Asked Questions
Can I Reuse the Brine From a Previous Batch of Pickles?
You can't reuse pickle brine for canning, but you can make refrigerator pickles with it. Just add fresh vegetables and a splash of vinegar, then store them in the fridge for up to two weeks.
Will These Pickles Stay Crunchy if I Make Them Without Calcium Chloride?
Yes, you'll get crunchy pickles without calcium chloride if you use fresh, small cucumbers and add natural tannins like grape or oak leaves. Soaking in ice water first and proper refrigeration also help maintain crispness.
How Long Will Unopened Jars of These Pickles Last in Refrigeration?
If you've properly sealed your jars, your unopened pickles can last up to 2 years in the refrigerator. While refrigeration isn't required, it'll help maintain quality and crunchiness longer than pantry storage.
Can I Process These in a Water Bath for Longer Shelf Life?
Yes, you can water bath process your pickles. Follow the method by submerging sealed jars in boiling water for 10-15 minutes. This'll make them shelf-stable for up to a year when stored properly.
Why Did My Pickles Turn Slightly Pink After a Few Weeks?
Your pickles likely turned pink due to over-mature dill or hard water minerals reacting with the vinegar. If you're concerned about yeast growth, check for cloudiness or sliminess. If those signs appear, don't eat them.
In Summary
You're now ready to start your pickle-making journey with confidence! Take what you've learned about apple cider vinegar brining, cucumber selection, and spice combinations to create crisp, tangy pickle spears. Don't worry if your first batch isn't perfect – pickling is all about experimentation and finding what works for you. Keep your workspace clean, your measurements precise, and you'll be a pickling pro in no time.


Leave a Reply