Sun-drying herbs works best during the warm, dry months from late spring through early fall. You'll want to harvest your spring herbs like basil and cilantro when they reach 6-8 inches tall, while summer herbs are best collected at the bursting bud stage. Always pick your herbs after morning dew has dried but before the intense afternoon heat. For indoor drying during winter months, you can use a sunny windowsill or move herbs to a well-ventilated space with temperatures between 95-115°F. Understanding your local climate and seasonal patterns will help you create the perfect year-round herb drying schedule.
Best Seasons For Herb Drying
Throughout the year, four distinct seasons offer unique opportunities for drying herbs, with spring and early summer providing the most favorable conditions. During these earlier months, you'll find plants are at their freshest, with fewer pests and diseases affecting their quality.
The cooler weather protects your herbs from sun damage, and early harvesting promotes healthier growth throughout the season. For best results, you'll want to harvest most herbs just before their flowers open, when essential oils and flavors are most concentrated. Using clean pruning shears ensures the healthiest possible harvest while protecting the plant.
Cut the stems above a leaf pair on sunny mid-mornings after the dew has evaporated. If you're working with oregano, you can start in late spring, while basil can be harvested continuously through the growing season.
Late summer and early fall present opportunities for drying less tender herbs like sage, thyme, and winter savory. As autumn arrives, you'll find the cooler, drier conditions perfect for air drying.
Fall harvesting helps you prepare for winter by building your herb stores, potentially reducing your grocery expenses. Just remember to verify your herbs are completely dry before storage to prevent mold growth.
Spring Herbs Collection Guide
In spring, you'll find an abundant selection of both annual and perennial herbs ready for harvesting and drying. Your timing matters – collect herbs just before their flowers open when their essential oils are most concentrated. Many herbs provide culinary and medicinal benefits when properly dried and stored. For best results, gather new leaves from the tips on sunny mornings after the dew has evaporated.
| Herb Type | Direct Sow | Propagation Method |
|---|---|---|
| Annual | Coriander, Dill, Chervil | Transplant after frost |
| Perennial | Marjoram, Oregano | Division and layering |
| Both | Basil, Cilantro | Varies by variety |
Before you start collecting, wash your hands thoroughly and prepare your tools. You'll need clean scissors to cut stems 4-6 inches above the ground, ensuring future growth. Remove lower leaves to create 1.5 inches of bare stem, then bundle them with twine. While you might be tempted to speed up the process with oven-drying, this can destroy the herbs' essential oils and flavors. Instead, air-dry your bundles in a well-ventilated area, using perforated paper bags to protect from dust while maintaining airflow. For small-leaved varieties, spread them on stainless steel screens or paper towels, checking regularly for mold.
Summer Harvesting Tips

Summer brings peak growing conditions for most herbs, making it the ideal season to maximize your harvesting efforts. To get the best results, you'll want to head out to your garden in the early morning after the dew has dried but before the day heats up. This timing helps prevent wilting and preserves the herbs' essential oils. Fluff bundles daily during the drying process to prevent any mold growth.
Focus on harvesting herbs just before their flowers open, when they're at the bursting bud stage. You'll find the most concentrated flavors in the new leaves at the plant tips. Using clean, sharp scissors, cut the stems just above a leaf pair, leaving 4-6 inches of growth for future harvesting.
If you're working with perennials like oregano or sage, don't cut more than half the plant's height.
After collection, rinse your herbs in cool water and shake off excess moisture. You can use a salad spinner or pat them dry with paper towels.
Before starting the drying process, carefully inspect each bundle for insects and remove any damaged or discolored leaves. For sun-drying, spread the herbs in a single layer on mesh screens, but remember to bring them inside at dusk to prevent moisture buildup.
Late Summer Herb Preservation
Based on the facts provided, sun-drying herbs isn't recommended for preserving your late summer harvest, as it can lead to flavor loss and insect problems.
You'll get better results by air-drying your herbs in small bundles away from direct sunlight or using a food dehydrator for consistent results.
Once your herbs are completely dry and crispy, store them immediately in sealed glass jars or airtight containers to maintain their freshness and flavor.
Harvest Before Peak Heat
When preserving herbs during late summer, timing your harvest becomes essential to maximize flavor and minimize plant stress.
You'll want to head out to your garden in the morning after the dew has dried but before the day's heat intensifies. This early timing guarantees you're capturing the herbs at their peak essential oil content while protecting both the plants and their valuable compounds from heat stress.
- Choose a sunny morning to harvest your herbs, as the plants will have higher concentrations of essential oils.
- Cut stems just above a leaf pair, leaving 4-6 inches for regrowth, and examine each branch for signs of pests or disease.
- Remove any imperfect leaves or stems before rinsing the herbs in cool water and patting them completely dry.
Best Storage After Drying
After carefully harvesting and drying your herbs, proper storage becomes the key to maintaining their vibrant flavors and medicinal properties throughout the year.
You'll want to guarantee your herbs are completely dry—they should be crispy and crumble easily, with stems that snap cleanly. If there's any moisture remaining, you risk mold growth that can ruin your entire harvest.
Choose rigid, opaque containers with airtight seals for storage. Ceramic jars or darkened glass containers work best as they protect your herbs from light exposure, which can deteriorate both flavor and color.
Before transferring your dried herbs, make certain your containers are completely dry and free of any moisture. Don't forget to label each container with the herb's name and date—you'd be surprised how similar many herbs look once they're dried.
Store your containers in a cool, dry place. When stored properly, most dried herbs will maintain their quality for up to a year.
Keep your herbs whole rather than crushing them, as they'll retain their flavor longer this way. You can check the strength of your stored herbs by their aroma—if they've lost their scent, they've likely lost their flavor too.
Fall Drying Schedule
As you plan your late-season herb collection, you'll need to move quickly before the first frost damages your garden's remaining herbs.
While outdoor drying becomes impractical with fall's cooler temperatures and increased humidity, you can easily shift to indoor drying spaces like a garage or spare room.
Keep a close eye on weather forecasts, and when temperatures threaten to drop below 40°F, harvest all remaining herbs for indoor drying to prevent frost damage.
Late Season Herb Collection
Many herbs flourish well into autumn, making fall an ideal time for your final harvest before winter sets in.
You'll want to focus on herbs like sage, parsley, rosemary, and thyme, which maintain their robust growth during cooler temperatures. For the best results, harvest your herbs in the morning after the dew has dried but before the afternoon sun diminishes their flavor and color.
Before you begin drying your late-season herbs, you'll need to prepare them properly. Start by removing any damaged or discolored leaves, then give them a thorough rinse in cool water.
Use a salad spinner or gentle shaking to remove excess moisture, followed by patting them dry with paper towels.
Here are three critical steps for successful late-season herb collection:
- Leave several inches of stem on the plant to support continued growth
- Harvest before plants begin flowering to guarantee maximum flavor concentration
- Remove lower leaves from stems to promote better air circulation during drying
Remember to inspect your herbs carefully for insects, especially when collecting seeds, and trim away any imperfect portions before proceeding with your chosen drying method.
Indoor Vs Outdoor Timing
While both indoor and outdoor drying can produce excellent results, your fall herb drying schedule will depend heavily on your local climate and available space.
If you're experiencing dry autumn weather, outdoor drying can work well for hardy herbs like rosemary, sage, and thyme, taking 5-10 days to complete. You'll want to gather these herbs in small bundles and hang them in a sheltered, well-ventilated area away from direct sunlight.
For indoor drying, you won't need to worry about weather conditions, making it ideal for tender herbs like basil, tarragon, and mint that require faster drying methods.
Using a dehydrator set between 90-115°F will dry your herbs within hours, while air-drying indoors typically takes 3-7 days. You'll know your herbs are ready when they crumble easily and the stems snap when bent.
Don't attempt outdoor drying if your area experiences high humidity or frequent rainfall during fall, as these conditions can lead to mold.
Instead, focus on indoor methods using a dehydrator, well-ventilated attic, or kitchen space. Remember to check your drying herbs daily, regardless of location, to guarantee proper drying conditions are maintained.
Frost Prevention Planning
Planning your frost prevention strategy starts with understanding the critical harvest window for your herbs. You'll need to harvest most herbs before the first frost to maintain their quality and flavor. The ideal time to gather your herbs is during the bursting bud stage, just before the flowers open.
Make sure to wait until morning dew has evaporated to prevent wilting, but harvest early enough to capture the herbs' peak essential oils.
Three key actions for successful frost prevention:
- Monitor weather forecasts closely and plan to harvest hardy herbs like sage, rosemary, and thyme before temperatures drop below freezing.
- Cut stems 4-6 inches from the base to protect the plant's future growth potential.
- Choose appropriate drying methods based on your herbs' moisture content – air-drying for woody herbs, dehydrator or oven for tender ones.
For best results, wash your harvested herbs in cool water and dry them thoroughly before processing.
You'll want to use a salad spinner or pat them dry with paper towels to remove excess moisture. Remember that tender-leaf herbs like basil and mint need faster drying methods to prevent mold, while woody herbs like thyme and oregano can handle traditional air-drying techniques.
Winter Indoor Drying Methods
During winter months, you'll need reliable indoor methods to dry your fresh herbs when outdoor sun-drying isn't practical. Your best options include air drying, screen drying, oven drying, and using a dehydrator.
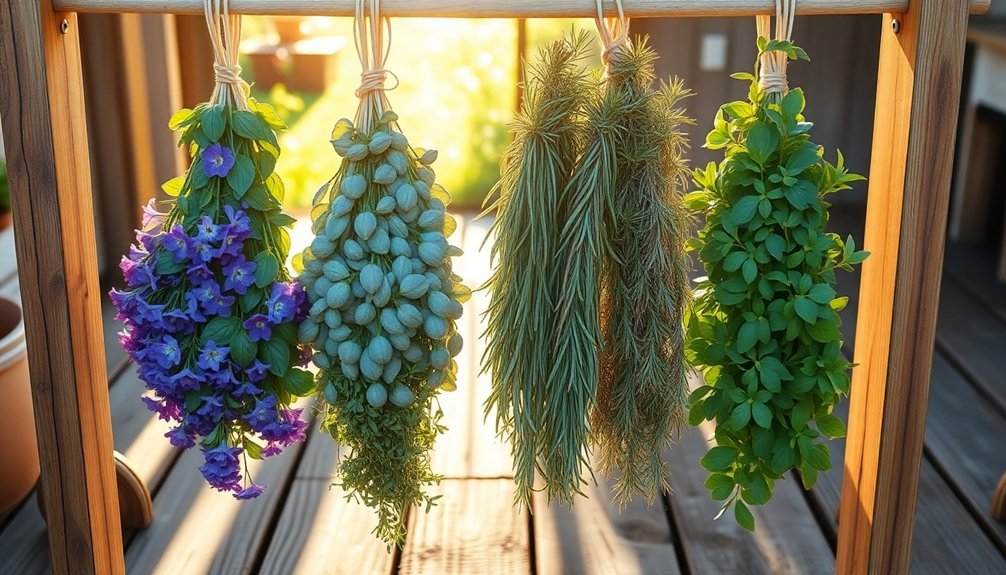
For air drying, tie your herbs in small bunches and hang them in a dark, well-ventilated area. You'll want to keep the bundles small to prevent mold formation and guarantee proper air circulation. If needed, use fans to improve airflow around the herbs.
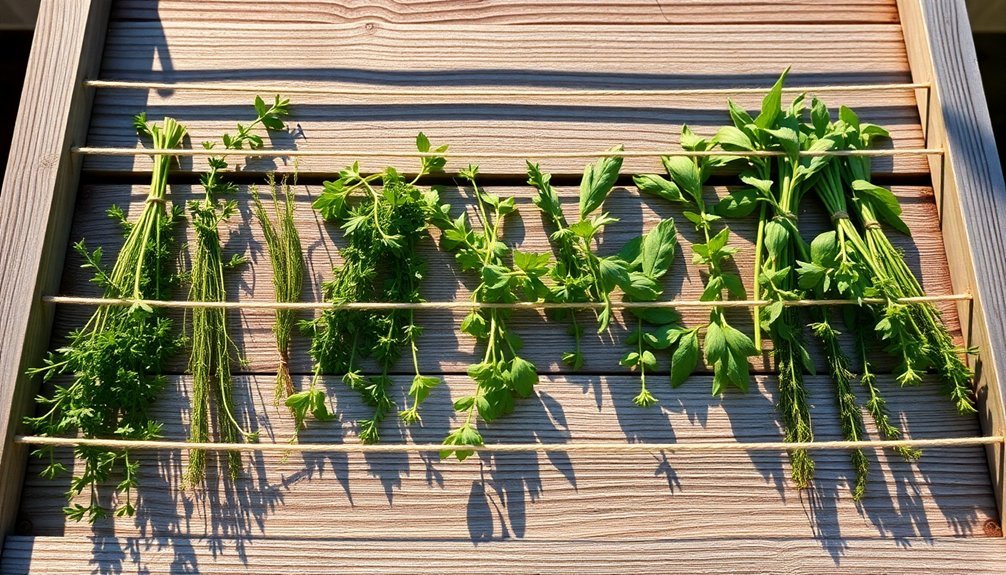
Screen drying offers another effective approach. Place your herbs in a single layer on elevated window screens or drying racks, making sure they're away from direct light. This method maximizes air exposure while preventing moisture buildup.
If you're looking for faster results, try oven drying at temperatures between 77°F and 95°F. You'll find gas ovens particularly effective due to their pilot light's steady temperature. Monitor your herbs every few hours, as they should take 24-48 hours to dry completely.
For precise control, consider using a dehydrator set to 80-90°F. This method works especially well for tender-leaf herbs, and you can dry multiple batches simultaneously using different trays. Check regularly to prevent over-drying.
Weather Impact On Drying

Whether you're drying herbs indoors or out, understanding weather conditions will make or break your success. Temperature control plays a vital role, with 55°C being ideal for most herbs. You'll want to avoid excessive heat, which can rupture trichomes and destroy essential oils, while guaranteeing enough warmth to prevent moisture buildup.
- Keep humidity levels between 16-23% when solar drying your herbs. Higher levels can promote mold growth, especially in tender-leafed varieties like mint, while proper humidity control speeds up the drying process and guarantees quality preservation.
- Protect your herbs from direct sunlight exposure. While you might think sun is beneficial, it can actually strip away flavors and oils. Instead, opt for a dark, warm space after the initial water evaporation phase.
- Maintain proper air circulation by spacing your herbs appropriately. Whether you're using drying racks or hanging methods, good airflow prevents moisture accumulation and dust buildup while guaranteeing even drying throughout your harvest.
You'll need to monitor these conditions regularly and adjust your drying setup accordingly. Remember that poor environmental control can quickly turn your carefully harvested herbs into flavorless, moldy waste.
Regional Drying Calendar
Your herb-drying success depends heavily on the humidity levels in your region, with areas like the Pacific Northwest requiring extra ventilation and monitoring due to moisture concerns.
You'll get the best results by timing your harvests in the early morning after dew has evaporated but before the day's heat sets in, particularly for delicate herbs like basil and mint that should be gathered before flowering.
For ideal year-round drying, track your local humidity with a gauge and adjust your methods seasonally, switching to indoor drying methods when outdoor conditions aren't favorable.
Best Drying Weather Conditions
The ideal conditions for sun-drying herbs depend heavily on your local climate and seasonal weather patterns. You'll want to monitor humidity levels closely, as they should stay between 45-55 percent to prevent mold growth and guarantee proper drying. If you're in a humid region like the Pacific Northwest, you might need to opt for a dehydrator instead of traditional air-drying methods.
- Check your local weather forecast for:
- No chance of rain in the next 24-48 hours
- Low morning dew predictions
- Consistent temperatures below 100°F (38°C)
While sun-drying might seem straightforward, you'll need to protect your herbs from direct sunlight to prevent flavor and color loss. Instead, choose a warm, well-ventilated area with indirect light.
If you're unsure about your local conditions, use a barometer or humidity gauge to determine if the weather is suitable for drying.
Woody herbs like rosemary and sage are your best options for air-drying in humid climates. For more delicate herbs, you'll achieve better results by using a temperature-controlled dehydrator set between 90°F (32°C) and 110°F (43°C), especially during summer months when humidity tends to spike.
Seasonal Harvesting Guide
Successfully drying herbs starts with proper harvesting timing throughout the year.
In spring, you'll want to harvest basil when it reaches 6-8 inches tall, while cilantro should be 6-12 inches long. Wait for chives to develop thick leaves, and pick lavender just before full bloom.
During summer, you'll find the most concentrated flavors in new leaves at the plant tips. Harvest oregano in mid-summer, and gather peppermint and thyme before they flower. You can take up to 75% of the current season's growth, but always follow the 1/3 rule for each harvest session, leaving 4-6 inches of stem intact.
Fall brings specific harvesting needs for winter preparation. Stop harvesting perennials about a month before frost to prevent tender growth. It's the ideal time to collect herb roots after foliage fades and gather seeds when pods turn from green to brown-gray.
For year-round success, harvest early in the morning after dew dries but before the day heats up. Always use clean scissors to cut just above leaf pairs, and rinse stems in cool water before drying.
Optimal Temperature And Humidity

Maintaining proper temperature and humidity levels stands at the heart of effective herb drying. You'll want to keep temperatures between 95°F and 115°F to preserve essential oils and flavors. If you're in a high-humidity environment, you might need to increase the temperature up to 125°F to compensate for slower drying times.
- Monitor Your Environment: Keep your herbs in a well-ventilated indoor space where you can control humidity levels. High humidity slows down the drying process and can lead to mold growth.
- Adjust Your Methods: Use a dehydrator or oven at their lowest settings, ensuring temperatures don't exceed 115°F for best results. If using an oven, keep the door slightly open to maintain air circulation.
- Consider Herb Types: Different herbs require different approaches. Tender-leaf herbs like basil and mint need quicker drying methods, while sturdier herbs like rosemary and sage can withstand longer drying times.
Remember to maintain consistent air circulation throughout the drying process. You'll know your herbs are properly dried when they crumble easily but aren't so dry that they turn to powder.
Monthly Herb Selection Chart
Four distinct seasons offer unique opportunities for herb harvesting throughout the year.
In spring, you'll find angelica, chervil, and chives ready for collection, with mint and parsley offering their fresh new growth for ideal drying.
Summer brings an abundance of herbs at their peak flavor. You can harvest basil in August, while dill should be collected just before it flowers.
July is perfect for gathering lavender blooms, and you'll find thyme ready throughout the season. Don't forget to continue harvesting mint during these warm months.
As autumn approaches, you'll want to focus on collecting mint's final harvest, along with rosemary and sage before the first frost hits.
Winter savory reaches its prime in late autumn, and thyme remains viable through the cooling temperatures.
Winter doesn't mean you can't continue harvesting. If you're growing herbs indoors, you'll have access to chives, oregano, and parsley year-round.
Bay laurel remains harvestable throughout the cold months, and hardy thyme varieties can withstand mild winter conditions.
You can maintain a consistent supply by planning your harvests according to these seasonal patterns.
Seasonal Storage Solutions

Once you've harvested your herbs according to the seasonal calendar, proper storage becomes the next key step. You'll need to choose between refrigeration, countertop storage, freezing, or drying methods based on your herbs' characteristics and your intended use.
1. For immediate use: Store hardy herbs in plastic bags with damp paper towels in your refrigerator, while tender herbs need a container with water and a plastic cover.
Keep basil and mint on your countertop in water, away from direct sunlight.
2. For long-term storage: Freeze chopped herbs in ice cube trays with water or olive oil. These cubes will last up to a year and work perfectly in cooked dishes like sauces and soups.
3. For preserved herbs: If you're drying your harvest, collect herbs in the morning after the dew has evaporated. You can use a dehydrator, oven, microwave, or air-dry them, though air-drying works best for sturdier varieties.
Remember to check refrigerated herbs every other day for spoilage, change water regularly for countertop storage, and always label your dried herbs with names and dates in airtight, opaque containers.
Frequently Asked Questions
Can Sun-Dried Herbs Be Safely Used in Baby Food Preparation?
You can safely use sun-dried herbs in baby food if they're properly dried, stored, and free from salt or contaminants. Just introduce them one at a time and monitor your baby for any reactions.
How Do Pesticides Affect the Sun-Drying Process of Herbs?
You'll find that sun-drying concentrates pesticide residues in your herbs by up to 5.19 times their original levels due to water evaporation. This increases health risks, especially if you're using treated herbs.
Do Different Colored Herb Varieties Require Different Drying Times?
You'll find that color doesn't affect drying times. Instead, the moisture content and leaf thickness determine how long herbs take to dry. Tender leaves dry faster than woody stems, regardless of their color.
Will Herbs Dried in Direct Sunlight Retain Their Medicinal Properties?
You'll lose significant medicinal properties when drying herbs in direct sunlight. The intense heat degrades volatile compounds and essential oils. It's better to dry your herbs in cool, dark conditions to preserve their benefits.
Can Sun-Dried Herbs Be Used for Making Natural Fabric Dyes?
You won't get the best results using sun-dried herbs for natural dyes, as they've lost significant color intensity. While it's possible, you'll achieve more vibrant colors using herbs dried through other methods.
In Summary
You'll find that sun-drying herbs isn't limited to summer months – with proper planning and timing, you can preserve herbs throughout the year. Match your harvesting schedule to each herb's peak season, and you'll maintain a steady supply of dried herbs for your kitchen. Remember to check your regional climate patterns and adjust your drying times accordingly. Store your dried herbs properly, and they'll retain their flavor for months to come.


Leave a Reply